Your SSH server is likely under attack hundreds of times a day. Saying it’s likely isn’t enough. I am confident that your server is attacked hundreds of times daily, almost with 100% certainty. Yet many developers hardly ever check the /var/log folder. Try running journalctl -f | grep ssh in the terminal right now.
If you can read the logs properly:
-
Who
-
When
-
Where
-
How
they attempted to access the server is vividly displayed.
This article summarizes how to interpret SSH server logs and find hacking signs through practical analysis from a developer's perspective.
1. Where are SSH Logs Stored?

The location of SSH logs varies slightly by Linux distribution.
Generally:
-
Ubuntu / Debian based
/var/log/auth.log
-
CentOS / RHEL based
/var/log/secure
-
Common commands for systemd
journalctl -u ssh.serviceorjournalctl -u sshd
You can use tail, but personally, I prefer viewing logs with journald because it consolidates logs from all services in one place.
# Example for Ubuntu
sudo tail -f /var/log/auth.log

# Example for CentOS/RHEL
sudo tail -f /var/log/secure

# Real-time viewing of systemd service logs
sudo journalctl -u ssh.service -f
Tip: Even on a development server, it's good to cultivate the habit of “monitoring logs” using tail -f every now and then.
Click "here" for detailed usage of journald!
2. Dissecting a Line in SSH Logs
Let's understand the structure by looking at a typical line from SSH logs. (Example from Ubuntu)
2.1 Successful Public Key Login
Jan 10 12:34:56 myserver sshd[12345]: Accepted publickey for deploy from 203.0.113.10 port 50312 ssh2: ED25519 SHA256:xxxx
The meaning of each part:
-
Jan 10 12:34:56: Date, time -
myserver: Hostname -
sshd[12345]: Process name (SSH daemon) and PID -
Accepted publickey: Authentication successful, the method is public key -
for deploy: Name of the logged-in account -
from 203.0.113.10: Source IP -
port 50312: Client-side port -
ssh2: ED25519 ...: Protocol/key type information
Understanding this allows you to quickly grasp “who connected from where using what key”.
2.2 Failed Password Login
Jan 10 12:35:01 myserver sshd[12346]: Failed password for root from 198.51.100.23 port 50320 ssh2
-
Failed password: Password authentication failed -
for root: Attempted login with the root account -
from 198.51.100.23: Remote IP
If you see these logs appearing dozens to hundreds of times within seconds,
it’s almost certain that it’s a brute-force attack.
2.3 Login Attempt with Invalid User
Jan 10 12:35:05 myserver sshd[12347]: Invalid user admin from 198.51.100.23 port 50325
Invalid user admin: Attempt to log in with a non-existentadminaccount on the server
This is also a common pattern used by automated bots.
3. Common Attack Patterns Seen in Logs
3.1 Brute-Force Attack
Characteristics:
-
Failed passwordlogs occur very frequently in a short time -
Attempts from the same IP in dozens to hundreds
-
Using account names like
root,admin,test,oracle
Quick confirmation example:
# Total count of Failed passwords
sudo grep "Failed password" /var/log/auth.log | wc -l

# Which accounts are under the most attack
sudo grep "Failed password" /var/log/auth.log \
  | awk '{for (i=1;i<=NF;i++) if ($i=="for") print $(i+1)}' \
  | sort | uniq -c | sort -nr | head
3.2 Invalid User Scans
sudo grep "Invalid user" /var/log/auth.log | head
A high number of these logs means “someone is randomly trying to guess what accounts exist on this server”.
3.3 Excessive Attempts from Specific IPs
To check which IP is failing particularly often:
sudo grep "Failed password" /var/log/auth.log \
  | awk '{print $(NF-3)}' \
  | sort | uniq -c | sort -nr | head
The $(NF-3) expression usually points to the IP part of from <IP>, but it can vary slightly by environment, so adjust according to your own log format.
4. Finding Anomalies Among “Successful” Logins
Attacks often leave a trail of failures, but the truly scary thing is a successful login.
4.1 Collecting Accepted Logs
sudo grep "Accepted" /var/log/auth.log
Pay particular attention to:
-
Logins from accounts that you don’t normally use
-
Logins at unusual times (e.g., 3 AM)
-
IPs from unfamiliar countries/ranges (not from your office/home/VPN)
4.2 Viewing Recent Login History
The last command shows recent login history.
# Recent SSH login records
last -i | head

# Failed logins (if supported in your environment)
lastb | head
Regularly checking this allows you to easily discover “login records at times when I wasn’t logged in.”
5. Practical Log Analysis: Quick Check Routine Example
Assuming you have an SSH server,
let’s create a check routine you can complete in 5 minutes.
5.1 Step 1: Check Total Failed Logins
sudo grep "Failed password" /var/log/auth.log | wc -l
sudo grep "Invalid user" /var/log/auth.log | wc -l
- If the numbers suddenly spike, it’s worth considering a “rise in attack intensity.”
5.2 Step 2: Top 10 IPs with Most Attacks
sudo grep "Failed password" /var/log/auth.log \
  | awk '{print $(NF-3)}' \
  | sort | uniq -c | sort -nr | head
- The leading IPs can be added to firewall/
fail2banrules.
5.3 Step 3: Login Attempts for Root
sudo grep "Failed password for root" /var/log/auth.log | tail
sudo grep "Accepted.*root" /var/log/auth.log
- If
Acceptedappears, it means someone has already logged in as root, which is very dangerous.
5.4 Step 4: Scan Recent Successful Logins
sudo grep "Accepted" /var/log/auth.log | tail -n 50
Points to check here:
-
Is it an IP I don’t know?
-
Is it during normal working hours?
-
Is it an account that suddenly appeared?
6. What Good Are Logs? Implementing Defense Measures
If you smelled an attack from the logs,
it’s time to transition to defensive settings.
6.1 Disable Password Logins (Allow Only Public Key)
In /etc/ssh/sshd_config:
PasswordAuthentication no
PubkeyAuthentication yes
After making the changes:
sudo systemctl reload sshd
# or
sudo service ssh restart
Be sure to successfully test public key login before disabling passwords.
Otherwise, you might lock yourself out.
6.2 Disable Direct Root Login
PermitRootLogin no
Avoid allowing direct root login,
and enforce logging in with a regular account and using sudo.
6.3 Change the Port (To Reduce Noise)
Port 22 # -> Change to: 2222
-
Changing the port doesn’t “enhance” security, but
-
it significantly reduces indiscriminate automated scans/attack logs, making “real anomalies” more noticeable.
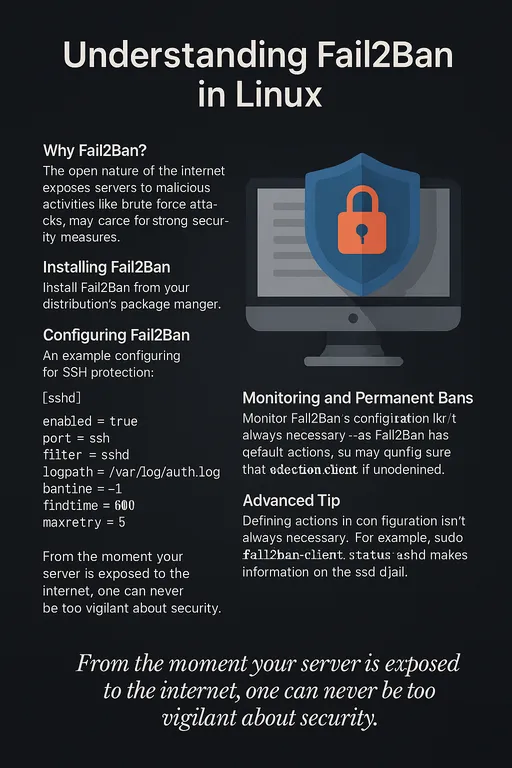
6.4 Use Tools like fail2ban
fail2ban monitors logs and
-
when the same IP
-
causes multiple login failures in a short period
-
Monitor
auth.logfor theFailed passwordpattern -
If a specific threshold is exceeded, block the IP using iptables/ufw
-
Allow
22/tcp(or the changed port) access only from specific fixed IPs or company VPNs -
Block everything else
it automatically adds firewall rules to block that IP.
The concept is simple:
This automates log analysis and automatically blocks brute-force attacks.
6.5 Limit SSH Access via Firewall
If possible:
Example with ufw
sudo ufw allow from 203.0.113.50 to any port 22 proto tcp
sudo ufw deny 22/tcp
7. “Minimal Log Check Routine” for Developers
Summarized to a realistic level that developers can maintain during work,
just doing below can completely change security sensitivity.
About once a week:
-
Check the number of
Failed passwordandInvalid userattempts from the past week -
Confirm the Top 10 IPs with most failures
-
In the
Acceptedlogs:-
Check for new IPs,
-
unusual timeframes,
-
unfamiliar accounts
-
-
Block suspicious IPs using firewall/
fail2ban, etc.
Just by observing once, you’ll develop an awareness that
“Ah, my server is indeed attacked every day,”
and a willingness to invest time in security settings.

Conclusion: Start Checking Logs Right Now
SSH security starts not with grand solutions, but with seeing what is actually happening on your server.
-
Check
/var/log/auth.logor/var/log/secure -
Read based on
Failed password,Invalid user, andAccepted -
If something seems off, immediately consider changing settings and introducing firewall and
fail2ban
If you've read this far,
you're now ready to prepare against hacking that results from not checking logs.
Now, open the terminal and take a look at the server logs yourself.
For developers, security must be a necessity and a routine, not an option.
For detailed guidance on using Fail2ban, click "here" to find more information.


There are no comments.