
✉️ We have now arrived at the core of the Dovecot configuration in our journey to build a mail server!
In the last post, we examined the structure of Dovecot's configuration files. Now, it's time to dive into the practical aspects.
📌 If you haven’t read the previous part, I highly recommend checking it out first.
👉 Building a Mail Server on Linux #3: Structure and Application of Dovecot Configuration Files
In this post, we will analyze four essential Dovecot configuration files that are crucial for operating the mail server and summarize practical configuration methods considering a virtual user environment and Postfix integration.
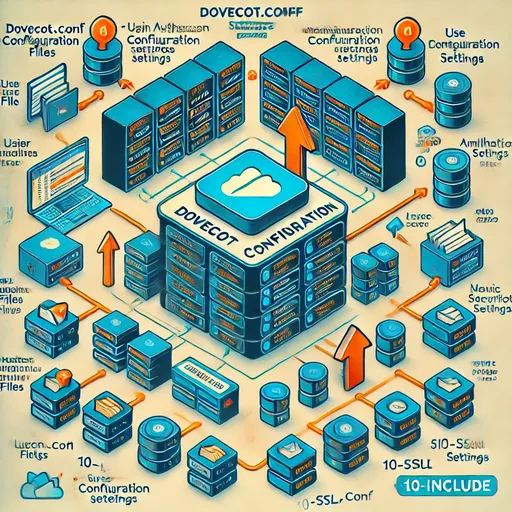
🚀 Four Essential Dovecot Configuration Files
There are so many Dovecot configuration files that it can be overwhelming at first. However, if you understand these four files properly, you will be able to operate a basic mail service.
| Configuration File | Role |
|---|---|
10-auth.conf |
User authentication settings |
10-mail.conf |
Mail storage (mailbox) settings |
10-master.conf |
Service process (IMAP, POP3, LMTP, etc.) settings |
10-ssl.conf |
TLS/SSL encryption settings |
We will go through each configuration file and apply settings that consider the virtual user environment and Postfix integration.
🛠️ The vmail User Created During Dovecot Installation
When Dovecot is first installed, a dedicated user and group named vmail (UID/GID 5000) are automatically created.
This user is responsible for storing and managing mail data, and is not a system account but rather a separate account for handling mail.
🔍 How to Check the vmail User
You can check the user by executing the following command in the terminal.
id vmail
Example output:
uid=5000(vmail) gid=5000(vmail) groups=5000(vmail)
You can also search directly in the /etc/passwd file.
grep vmail /etc/passwd
If the vmail user does not exist, you need to manually create it with the following commands.
sudo groupadd -g 5000 vmail
sudo useradd -u 5000 -g vmail -s /sbin/nologin -d /var/mail vmail
✅ You can now use the vmail user in the Dovecot configuration to store mail!
1️⃣ 10-auth.conf - User Authentication Settings
This file is a very important configuration file that determines the user's authentication method.
We will be setting this up considering that we want to build a virtual user environment.
📌 Important Configuration Points
- Authenticate using a virtual user approach (DB integration)
- Activate PLAIN and LOGIN authentication methods (for secure use in SSL environment)
- Authenticate using DB instead of system accounts (/etc/passwd)
🔹 Example Configuration File (/etc/dovecot/conf.d/10-auth.conf)
disable_plaintext_auth = yes
auth_mechanisms = plain login

!include auth-sql.conf.ext
💡 Explanation
disable_plaintext_auth = yes→ Plain text authentication is allowed only when SSL is usedauth_mechanisms = plain login→ Most commonly used authentication methods for IMAP, POP3!include auth-sql.conf.ext→ Configured to retrieve authentication information from the database
✍ This means that Dovecot is configured to authenticate using a DB such as MySQL instead of directly using system accounts like /etc/passwd.
In the next part, we will cover the auth-sql.conf.ext file in detail!
2️⃣ 10-mail.conf - Mail Storage Settings
This configuration file determines where the mail is actually stored. It is common to store mail in Maildir format in conjunction with Postfix.
📌 Important Configuration Points
- Use Maildir format
- Set storage path for virtual users' mail
- Configure mail permissions
Example Configuration File (/etc/dovecot/conf.d/10-mail.conf)
mail_home = %h
mail_location = maildir:%h/Maildir

namespace inbox {
  inbox = yes
}

mail_uid = vmail
mail_gid = vmail
mail_privileged_group = mail
💡 Explanation
mail_home = %h→ Use the virtual user's home directory (path to be specified directly in the DB)mail_location = maildir:%h/Maildir→ Store mail in Maildir formatmail_uid,mail_gid→ Use a dedicated user for mail storage (vmail)namespace inbox { inbox = yes }→ Designate as the main inbox
✍ This means that we configure the management of user mail to utilize a separate vmail account instead of a specific system account.

3️⃣ 10-master.conf - Service Process Settings
This file configures the services provided by Dovecot (IMAP, POP3, LMTP, etc.).
In particular, since we plan to use LMTP (Local Mail Transfer Protocol) in conjunction with Postfix, we need to activate this.
📌 Important Configuration Points
- Activate LMTP (in conjunction with Postfix)
- Configure authentication socket (set Postfix to use Dovecot's authentication)
🔹 Example Configuration File (/etc/dovecot/conf.d/10-master.conf)
service lmtp {
  unix_listener /var/spool/postfix/private/dovecot-lmtp {
    mode = 0600
    user = postfix
    group = postfix
  }
}

service auth {
  unix_listener /var/spool/postfix/private/auth {
    mode = 0666
    user = postfix
    group = postfix
  }

  unix_listener auth-userdb {
    mode = 0600
    user = vmail
    group = vmail
  }

  client {
    path = /run/dovecot/auth-client
  }
}
💡 Explanation
- Activate LMTP (service lmtp)
- Postfix uses the
dovecot-lmtpsocket to pass mail to Dovecot - Postfix and Dovecot authentication integration (service auth)
- Configures Postfix to retrieve authentication information from Dovecot through the
/var/spool/postfix/private/authsocket
✍ This means that we set it so that Postfix handles user authentication through Dovecot and that mail delivery is also integrated via LMTP.
4️⃣ 10-ssl.conf - TLS/SSL Encryption Settings
Mail servers must be encrypted! This file configures SSL/TLS to enhance security.
📌 Important Configuration Points
- Activate SSL/TLS encryption
- Can use Let’s Encrypt or self-signed certificates
📌 ⚠️ The process for obtaining an SSL certificate is omitted in this article.
Assume we have already acquired a certificate for the domain and we can use Let’s Encrypt, self-signed certificates, or commercial certificates.
Example Configuration File (/etc/dovecot/conf.d/10-ssl.conf)
ssl = required
ssl_cert = </etc/letsencrypt/live/mail.example.com/fullchain.pem
ssl_key = </etc/letsencrypt/live/mail.example.com/privkey.pem
💡 Explanation
ssl = required→ SSL is mandatoryssl_cert,ssl_key→ Apply encryption using Let’s Encrypt certificate
✍ This means preventing clients from accessing without encryption and enhancing security through TLS.
🏁 Summary
✅ In this article, we covered the four essential Dovecot configuration files
- 10-auth.conf → User authentication methods (applying DB-based virtual user environment)
- 10-mail.conf → Mail storage path and permissions settings (applying mail_home = %h)
- 10-master.conf → LMTP and authentication service settings linked with Postfix
- 10-ssl.conf → SSL/TLS security settings (Let’s Encrypt configuration omitted)
If you understand these settings correctly, you will be able to set up an environment for sending and receiving mail in conjunction with Postfix. In the next part, we will cover the database settings for the virtual user environment (auth-sql.conf.ext)! 🚀
Also, check out previous posts or other articles in the mail server building series! Please search for “dovecot” or “mail” in the search box at the top right or check the “Similar Posts” below!


There are no comments.