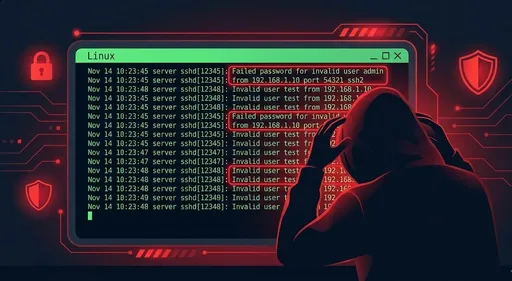
When you start operating a server, you face numerous external attacks. SSH brute force attacks, indiscriminate login attempts targeting web applications, and port scanning are everyday threats. If these threats are left unchecked, they can ultimately lead to system breaches. Fail2Ban is a lightweight yet powerful Linux-based intrusion prevention solution that addresses these issues.
Fail2Ban automatically detects and blocks suspicious IPs, allowing administrators to protect their servers without much effort.
How to Install Fail2Ban
Fail2Ban is available as a package in most Linux distributions, making it very easy to install.
Ubuntu/Debian-based Systems
sudo apt update
sudo apt install fail2ban
Once the installation is complete, start the service and set it to launch automatically at boot.
sudo systemctl start fail2ban
sudo systemctl enable fail2ban
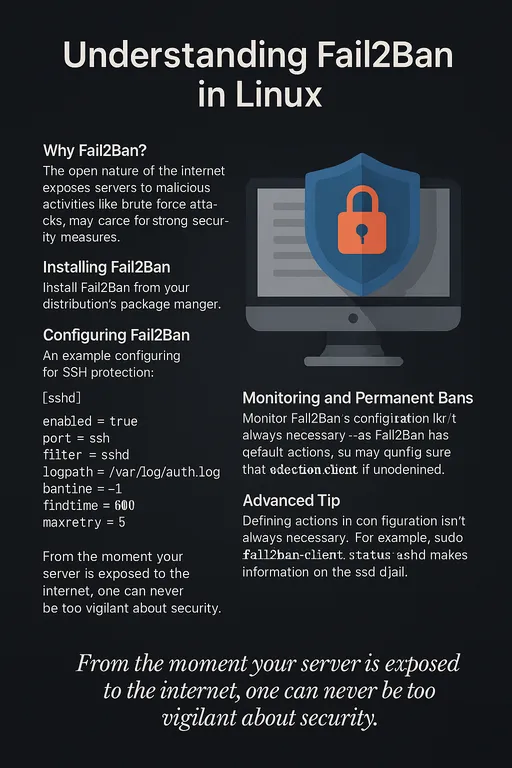
Basic Configuration of Fail2Ban
Fail2Ban uses the /etc/fail2ban/jail.conf file as its default configuration file, but it is recommended to create a /etc/fail2ban/jail.local file for customization instead of modifying the original file directly.
Creating a jail.local File:
sudo cp /etc/fail2ban/jail.conf /etc/fail2ban/jail.local
Main Configuration Items: - bantime: Block duration (in seconds) - findtime: Time range to consider as an attack (in seconds) - maxretry: Maximum allowed failed attempts
[DEFAULT]
bantime = 3600
findtime = 600
maxretry = 5

[sshd]
enabled = true
port = ssh
filter = sshd
logpath = /var/log/auth.log
Examples of Real Applications
1. Blocking SSH Brute Force
By configuring the [sshd] jail as above, if there are more than 5 failed login attempts, the corresponding IP will be blocked for an hour.
2. Blocking Apache Login Attacks
[apache-auth]
enabled = true
filter = apache-auth
logpath = /var/log/apache2/error.log
maxretry = 3
This will block access if there are 3 failed authentication attempts to the web server.
How to Monitor Fail2Ban
There are several ways to monitor if Fail2Ban is operating correctly.
1. Checking Status with fail2ban-client
You can check the status of a specific jail (e.g., sshd).
sudo fail2ban-client status sshd
Example output:
Status for the jail: sshd
|- Filter
|  |- Currently failed: 2
|  |- Total failed: 15
|  `- File list:    /var/log/auth.log
`- Actions
   |- Currently banned: 1
   |- Total banned: 3
   `- Banned IP list: 192.168.1.100
2. Monitoring Log Files
The activity log for Fail2Ban is recorded in the /var/log/fail2ban.log file.
tail -f /var/log/fail2ban.log
This allows you to monitor block and unblocking events in real-time.
How Fail2Ban Works
-
Log Monitoring: Fail2Ban continuously watches specified log files (e.g.,
/var/log/auth.log,/var/log/apache2/error.log). -
Applying Filters: It detects specific patterns (login failures, authentication errors, etc.) through filters.
-
Taking Action: If the configured
maxretryis exceeded, it blocks the IP using iptables or executes firewall commands like firewall-cmd or nftables. -
Automatic Unblocking: Once the
bantimehas elapsed, the block is lifted automatically.
Fail2Ban's modular structure allows for independent monitoring and blocking settings for various services (jails), enhancing security beyond simple SSH protection.
How to Set Up Permanent Blocking for SSH Attacks
It is essential to deal firmly with SSH attackers. In Fail2Ban, setting bantime to -1 allows for permanent blocking.
[sshd]
enabled = true
port = ssh
filter = sshd
logpath = /var/log/auth.log
bantime = -1
findtime = 600
maxretry = 5
With this configuration, any IP with more than 5 failed SSH logins will be permanently blocked, preventing access to the server.
[Advanced Tip] Understanding Fail2Ban's Default Blocking Action
Fail2Ban works by default without having to explicitly define the action, as the default settings include blocking commands using iptables.
- If you do not specify an
action, the setting from the[DEFAULT]section,action = %(action_)s, will be applied. %(action_)sperforms actions internally using theiptablescommand to block malicious IPs.- Therefore, blocking of IPs is carried out by iptables without the need for a separate write-up for
action.
Example of Default Blocking Command (see action_.conf)
iptables -I INPUT -s <ip> -j REJECT
This means Fail2Ban automatically controls iptables to block attacking IPs.
Note:
- If you want to use other firewall tools such as UFW or firewalld, you need to set the action explicitly.
- Additionally, blocking rules may disappear when the server reboots, so it is advisable to ensure Fail2Ban service starts automatically on boot.
In addition, you can create and apply various filters or configure email alerts as advanced settings.
From the moment your server is exposed to the Internet, security is not an option, but a necessity.
A moment of negligence can lead to catastrophic results.
Fail2Ban will serve as a strong shield to block such threats in advance.
Remember that someone is targeting your server at this very moment.


There are no comments.