Can You Use PyTorch Without NumPy?
If you’re a deep‑learning developer, you’ve probably wondered about the relationship between these two ubiquitous libraries.
When you look at fine‑tuning scripts, you’ll always see these imports:
import numpy as np
import torch
“But all tensor operations are in PyTorch… why do I need NumPy?” “They seem to overlap—do I really need to study NumPy separately?”
I was curious too, and after finding a clear explanation, I’ve organized the key points here.
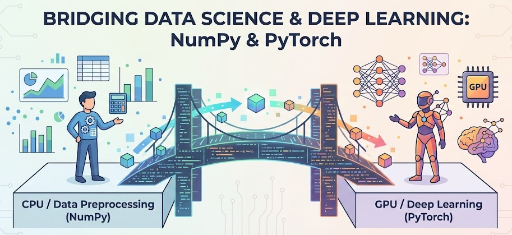
1. What’s the Difference Between NumPy and PyTorch?

In a nutshell, PyTorch can be described as:
“GPU‑enabled NumPy + automatic differentiation (autograd)”
Breaking it down:
- NumPy
- Runs on the CPU
- The de‑facto standard for numerical computing, linear algebra, and statistics in Python
-
Operates around the
ndarraydata structure -
PyTorch
- Shares a very similar API to NumPy
- Can run on both CPU and GPU (CUDA)
- Adds automatic differentiation, making deep‑learning training possible
PyTorch developers intentionally borrowed a lot of NumPy syntax:
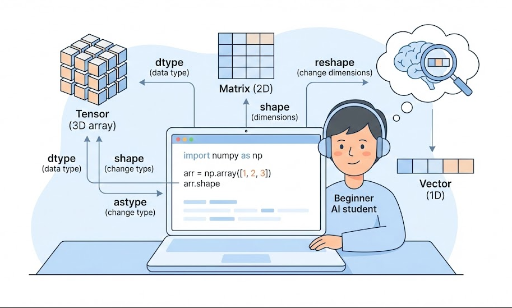
np.array([...])→torch.tensor([...])x_np.shape→x_torch.shapenp.reshape(x, …)→x_torch.view(…)orx_torch.reshape(…)
So as you learn PyTorch tensor operations, you naturally pick up NumPy‑style thinking and syntax.
2. Do I Need to Learn NumPy First?
Many tutorials start with NumPy, which can be confusing. From a practical standpoint, the answer is:
You don’t have to master NumPy before PyTorch. PyTorch can get you started with tensor operations right away.
Why? Because:
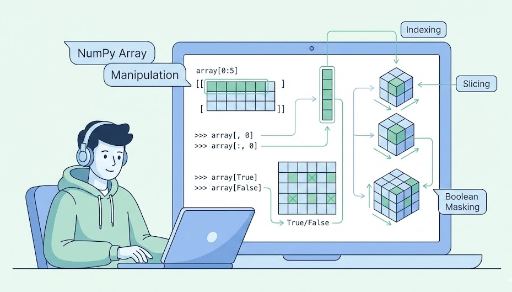
- Concepts like shape, broadcasting, and indexing work almost identically in NumPy and PyTorch.
- In deep learning, we mainly use tensor operations + autograd, which is exclusive to PyTorch.
So if deep learning is your goal:
- Learn PyTorch tensor manipulation first.
- When you see
np.xxxin code, think of it as the CPU‑array counterpart of a PyTorch operation.
3. Why NumPy Still Shows Up: “The Ecosystem’s Common Language”
You might wonder, “If PyTorch is more powerful, why not use only PyTorch tensors?”
The short answer: Most of the Python data‑science ecosystem is built around NumPy.
3‑1. Data‑Preprocessing: The NumPy World
Common libraries return NumPy arrays:
OpenCV,Pillow→ images as NumPy arrayspandas→DataFrame.values/to_numpy()- Many statistical/numerical packages use NumPy for input/output
Thus, data manipulation before feeding a model is largely NumPy‑centric.
3‑2. Model Training / Inference: The PyTorch World
import numpy as np
import torch

x_np = ...  # pre‑processed NumPy array
x_tensor = torch.from_numpy(x_np)  # convert to tensor
x_tensor = x_tensor.to("cuda")     # move to GPU

out = model(x_tensor)
From here on, you’re in the PyTorch universe.
3‑3. Visualization / Post‑Processing: Back to NumPy
After predictions:
matplotlibfor plottingpandasfor CSV export- Simple statistics
These libraries expect NumPy arrays, so you’ll convert back:
out_cpu = out.detach().cpu().numpy()
A common error is:
TypeError: can't convert cuda:0 device type tensor to numpy
You must first move the tensor to the CPU before calling .numpy().
4. System‑Level Insight: “Zero‑Copy” Sharing
A neat low‑level detail: when you do
x_np = np.random.randn(3, 3)
x_tensor = torch.from_numpy(x_np)
no data is copied. torch.from_numpy creates a tensor that shares the same memory as the NumPy array. Likewise, x_tensor.numpy() (for a CPU tensor) returns a NumPy array that points to the same memory.
This means:
x_np = np.zeros((2, 2))
x_tensor = torch.from_numpy(x_np)

x_tensor[0, 0] = 1
print(x_np)
# [[1. 0.]
#  [0. 0.]]  ← NumPy array changes too
Both views see the same underlying data.
In short: * PyTorch and NumPy can share memory on the CPU. * This allows fast, zero‑copy transitions between preprocessing (NumPy) → training (PyTorch) → post‑processing (NumPy).
5. A Quick End‑to‑End Example
Consider a simple image‑classification pipeline:
import cv2
import numpy as np
import torch

# 1. Load & preprocess image (NumPy)
img = cv2.imread("cat.png")          # (H, W, C), BGR, NumPy array
img = cv2.cvtColor(img, cv2.COLOR_BGR2RGB)
img = cv2.resize(img, (224, 224))
img = img.astype(np.float32) / 255.0
img = np.transpose(img, (2, 0, 1))   # (C, H, W)

# 2. Convert to PyTorch tensor & move to GPU (PyTorch)
x = torch.from_numpy(img)            # (3, 224, 224)
x = x.unsqueeze(0)                   # add batch dim: (1, 3, 224, 224)
x = x.to("cuda")

# 3. Inference
with torch.no_grad():
    logits = model(x)
    probs = torch.softmax(logits, dim=1)

# 4. Convert back to NumPy for post‑processing (NumPy)
probs_np = probs.cpu().numpy()
pred_class = np.argmax(probs_np, axis=1)[0]
The flow naturally places NumPy at the input/output boundaries and PyTorch in the middle.
6. Bottom‑Line Takeaways
- Studying PyTorch is like learning a future‑proof NumPy. The tensor API and broadcasting feel the same.
- You don’t need to dive deep into NumPy if your goal is deep learning. Treat
np.xxxas the CPU‑array counterpart of a PyTorch operation. - In practice, you’ll still use NumPy for data preprocessing, post‑processing, visualization, and statistics.
- PyTorch ↔ NumPy conversions (
.numpy(),torch.from_numpy,.cpu()) are frequent and worth mastering. - Zero‑copy sharing lets you move large arrays between the two worlds efficiently.
When you read deep‑learning code, keep this mental model:
Tensor on GPU + autograd → PyTorch Data exchange & simple math → NumPy
Flipping seamlessly between these two is a core skill for modern Python deep‑learning developers.

There are no comments.