Django is a fantastic framework with robust security features built-in. However, many developers make the mistake of leaving the /admin URL created by following official documentation or tutorials as it is, especially in the early stages of a project.
This is akin to putting up a billboard that says, "Our front door is right here." Automated scanners and attack bots around the world will first scan example.com/admin/ once they discover your website.
In this article, I will introduce some key ways to securely protect the Django admin page, from simple URL changes to actively blocking intruder IPs, focusing on why you should do this.
1. The Basics: Change the Admin URL (Using Environment Variables)
It's the easiest, fastest, and most effective first line of defense.
🤔 WHY: Why Hide the URL?
Attackers cannot attempt brute force attacks or credential theft if they don’t know the URL. By using an obscure path like my-super-secret-admin-path/ instead of the well-known /admin, you can block 99% of automated attacks.
'Obscurity' is not 'security', but it is the most cost-effective barrier available.
🚀 HOW: Injecting via Environment Variables
It is best practice to inject the URL using environment variables instead of hardcoding it into your code.
- .env file (or server environment variable settings)
# .env
# Use a complex string that no one can guess.
DJANGO_ADMIN_URL=my-secret-admin-portal-b7x9z/
- settings.py
# settings.py
import os

# Set a default but read from the environment variable
ADMIN_URL = os.environ.get('DJANGO_ADMIN_URL', 'admin/')
- urls.py (Main Project)
# urls.py
from django.contrib import admin
from django.urls import path
from django.conf import settings # Import settings module

urlpatterns = [
    # Use settings.ADMIN_URL instead of admin/
    path(settings.ADMIN_URL, admin.site.urls),
    # ... other urls
]
Now, even if you use admin/ in the development environment, you can hide the actual admin path by simply changing the environment variable on the production server.
2. Building a Wall: Limit Access by IP in Nginx
This is a powerful way to block access to the admin page at all if the URL is exposed and the IP is not allowed.
🤔 WHY: Why should we block in Nginx?
This method blocks attack traffic before it reaches Django (the application) at the web server (Nginx) level. This means Django will not even be aware that an attack has been attempted, thus saving unnecessary resources. This is the safest method if the administrator only accesses from specific IPs (like an office or VPN).
HOW: Nginx Configuration Example
Add a location block to the Nginx configuration file (the site settings in sites-available).
server {
    # ... (existing settings)

    # Specify the same path as the ADMIN_URL environment variable
    location /my-secret-admin-portal-b7x9z/ {
        # 1. Allowed IP addresses (e.g., fixed office IP)
        allow 192.168.0.10;
        # 2. Allowed IP range (e.g., VPN range)
        allow 10.0.0.0/24;
        # 3. Localhost (server internal)
        allow 127.0.0.1;

        # 4. Deny access to all IPs not specified above
        deny all;

        # 5. Forward all requests to uwsgi/gunicorn proxy
        include proxy_params;
        proxy_pass http://unix:/run/gunicorn.sock;
    }

    # ... (other location settings)
}
Now, if any user outside the allowed IP tries to access that URL, Django will not respond at all, and Nginx will immediately return a 403 Forbidden error.
3. Assigning a Gatekeeper: Limit Login Attempts (django-axes)
If an attacker manages to figure out the URL and bypass the IP restrictions, now we need to block brute force attacks.
🤔 WHY: Why should we limit the number of attempts?
Brute force attacks automatically input thousands and tens of thousands of passwords against common account IDs like 'admin'. Packages like django-axes create rules like "If there are more than 5 failed login attempts in a short period, lock that IP or account for a specified time".
This renders automated scripts nearly useless.
HOW: Using django-axes
django-axes is the most standard package for this purpose.
-
Installation:
pip install django-axes -
Register in settings.py:
INSTALLED_APPS = [
    # ...
    'axes', # Recommended to place above other apps
    # ...
    'django.contrib.admin',
]

AUTHENTICATION_BACKENDS = [
    # AxesBackend should be at the top.
    'axes.backends.AxesBackend',
    # Default Django authentication backend
    'django.contrib.auth.backends.ModelBackend',
]

# Lock for 10 minutes after 5 failed attempts (default)
AXES_FAILURE_LIMIT = 5
AXES_COOLOFF_TIME = 0.166 # 0.166 * 60 = about 10 minutes
- Migrate:
python manage.py migrate
Now, if someone fails to log in 5 consecutive times, axes will record those attempts and block logins for the given IP/account for the specified duration.
4. Dual Lock: Two-Factor Authentication (2FA)
This is the last line of defense in case the password gets compromised.
🤔 WHY: Why is 2FA necessary?
The administrator account's password may have been leaked, or it could be an easy password. Two-Factor Authentication requires both "something I know (password)" and "something I have (smartphone OTP)".
Even if a hacker steals the password, they cannot log in without the administrator's smartphone.
HOW: Using django-otp
django-otp is the essential package for integrating 2FA into Django.
-
Installation:
pip install django-otp -
Register in settings.py:
INSTALLED_APPS = [
    # ...
    'django_otp',
    'django_otp.plugins.otp_totp', # Supports Google Authenticator, etc.
    # ...
]

MIDDLEWARE = [
    # ...
    'django_otp.middleware.OTPMiddleware', # After SessionMiddleware
    # ...
]
django-otp provides the basic framework, and using a package that easily integrates it into the admin, like django-two-factor-auth, allows for an easy implementation of the entire process where users can scan and register QR codes.
5. Setting Traps: Integrate Honeypot and Fail2Ban
This is the most aggressive defense method. It utilizes the attacker's /admin scanning attempts against them by permanently banishing them from the server.
🤔 WHY: Why set traps?
Attackers will continue to scan for /admin anyway. So why not turn this path into a fake trap (Honeypot) and immediately block any IP that attempts to access it?
HOW: Fake Admin + Fail2Ban
This method is somewhat complicated but very effective.
- Create a Fake Admin View: Hide the actual admin URL as in step 1, setting it to
my-secret-admin-portal-b7x9z/. Then link a fake view to the abandoned/admin/path.
# urls.py
from django.urls import path
from . import views # Import fake view

urlpatterns = [
    path('my-secret-admin-portal-b7x9z/', admin.site.urls), # Real
    path('admin/', views.admin_honeypot), # Fake (trap)
]

# views.py
import logging
from django.http import HttpResponseForbidden

# Setting up honeypot-specific logger (need to define 'honeypot' logger in settings.py)
honeypot_logger = logging.getLogger('honeypot')

def admin_honeypot(request):
    # Log the IP of the access attempt
    ip = request.META.get('REMOTE_ADDR')
    honeypot_logger.warning(f"HONEYPOT: Admin access attempt from {ip}")

    # Show a 403 error to the attacker
    return HttpResponseForbidden()
-
Configure Fail2Ban:
Fail2Banis a tool that monitors server logs in real-time and, upon detecting specific patterns (e.g., "HONEYPOT: ..."), adds the IP that generated the log toiptables(Linux firewall) to block it.-
Ensure Django is set to log to
honeypot.log. -
Set Fail2Ban to watch
honeypot.log. -
If someone accesses
/admin/,views.pylogs it, and Fail2Ban detects it, immediately blocking all access (SSH, HTTP, etc.) from that IP.
-
Summary
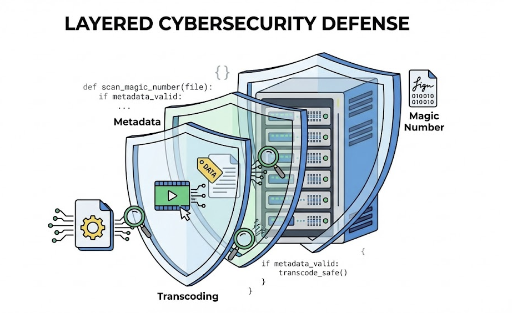
Securing the Django admin page relies on building multiple layers of defense.
-
(Mandatory) 1. Change the URL: Invest 5 minutes to do this right now.
-
(Recommended) 2. IP Restrictions: This is the strongest measure if you have static IPs.
-
(Recommended) 3. django-axes: Prevents brute force attacks.
-
(Highly Recommended) 4. 2FA: Effectively prevents account takeover.
-
(Advanced) 5. Honeypot: Aggressive defense to protect the entire server.
Leaving /admin as is is an act of negligence towards security. Check your urls.py right away.


There are no comments.