Django Formsの核心はフィールド(Field)とウィジェット(Widget)です。フィールドは入力データを検証し処理する役割を果たし、ウィジェットはそのフィールドをレンダリングするHTML要素を定義します。この文章では、主要なフィールドとウィジェット、そしてカスタマイズ方法を詳しく見ていきます。
1. Django Forms フィールド
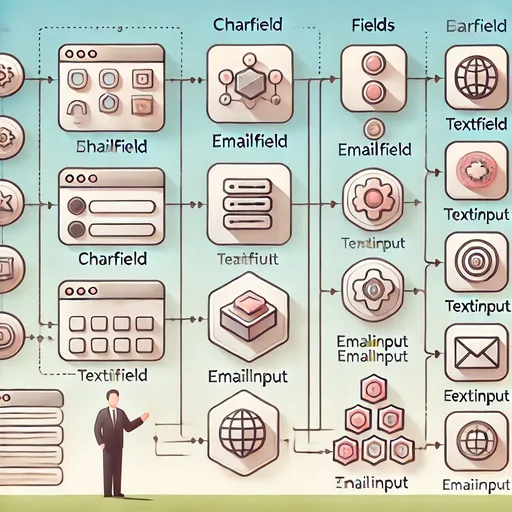
1.1 フィールドとは?
フィールドはDjango Formsにおいてデータを定義し検証する基本的な構成要素です。
- ユーザーが入力したデータを受け取り
cleaned_dataとして保存する前に検証します。 - 各フィールドはHTML入力タイプとマッピングされます。
主要フィールドの種類
| フィールド | 説明 | 例ウィジェット |
|---|---|---|
CharField |
文字列入力フィールド | TextInput |
EmailField |
メール形式入力フィールド | EmailInput |
IntegerField |
整数入力フィールド | NumberInput |
DateField |
日付入力フィールド | DateInput |
ChoiceField |
オプション選択フィールド | Select |
BooleanField |
チェックボックス入力フィールド | CheckboxInput |
FileField |
ファイルアップロードフィールド | FileInput |
フィールド基本使用法
from django import forms

class ExampleForm(forms.Form):
    name = forms.CharField(max_length=50, required=True, label="Your Name")
    email = forms.EmailField(required=True, label="Your Email")
    age = forms.IntegerField(required=False, min_value=1, label="Your Age")
2. Django Forms ウィジェット
2.1 ウィジェットとは?
ウィジェットはDjango Formsにおいて各フィールドがHTMLでレンダリングされる際に使用される要素です。
- フィールドのHTMLタグと属性を定義します。
- 例:
CharFieldは基本的にTextInputウィジェットを使用します。
主要ウィジェットの種類
| ウィジェット | レンダリングされるHTMLタグ | 使用フィールド |
|---|---|---|
TextInput |
<input type="text"> |
CharField |
EmailInput |
<input type="email"> |
EmailField |
NumberInput |
<input type="number"> |
IntegerField |
DateInput |
<input type="date"> |
DateField |
Select |
<select> |
ChoiceField |
CheckboxInput |
<input type="checkbox"> |
BooleanField |
FileInput |
<input type="file"> |
FileField |
2.2 フィールドとID属性
Django FormsはHTMLでレンダリングされるときに各フィールドに固有のid属性を自動的に追加します。この属性はid_<fieldname>形式で生成されます。
- 例: フィールド名が
nameの場合、レンダリングされた<input>タグのidはid_nameになります。 - この
id属性はテンプレートで次のような場合に便利です:- JavaScript: 特定のフィールドを選択して動的に処理する。
- Labelタグ:
<label for="id_name">で接続する。
例: フィールドとID属性活用
<form method="post">
    {% csrf_token %}
    <label for="id_name">Name:</label>
    <input type="text" id="id_name" name="name">

    <script>
        document.getElementById('id_name').addEventListener('input', function() {
            console.log(this.value);
        });
    </script>
</form>
3. フィールドとウィジェットのカスタマイズ
3.1 フィールド属性カスタマイズ
Django Formsはattrsを使用してHTML要素の属性を変更できます。
例: フィールド属性変更
class CustomForm(forms.Form):
    username = forms.CharField(
        max_length=100,
        widget=forms.TextInput(attrs={
            'class': 'form-control',
            'placeholder': 'Enter your username'
        })
    )
    email = forms.EmailField(
        widget=forms.EmailInput(attrs={
            'class': 'form-control',
            'placeholder': 'Enter your email'
        })
    )
3.2 カスタムウィジェット作成
必要に応じてユーザー定義のウィジェットを作成して使用することもできます。
例: カスタムウィジェット作成
from django.forms.widgets import TextInput

class CustomTextInput(TextInput):
    template_name = 'custom_widgets/custom_text_input.html'

class CustomForm(forms.Form):
    custom_field = forms.CharField(widget=CustomTextInput())
4. 実践例: スタイリングされたフォーム作成
4.1 ブootstrap適用
Bootstrapと一緒に使用する際、各フィールドにclass='form-control'を追加してスタイリングできます。
例: Bootstrapスタイルフォーム
class BootstrapForm(forms.Form):
    name = forms.CharField(
        widget=forms.TextInput(attrs={'class': 'form-control', 'placeholder': 'Enter your name'})
    )
    email = forms.EmailField(
        widget=forms.EmailInput(attrs={'class': 'form-control', 'placeholder': 'Enter your email'})
    )
4.2 カスタムCSSとフォームスタイリング
CSSファイルを追加してフォームスタイルをさらに詳細に調整できます。
例: CSSと連携したテンプレート
<form method="post">
    {% csrf_token %}
    <div class="form-group">
        <label for="id_name">Your Name</label>
        <input type="text" class="form-control" id="id_name" name="name">
    </div>
    <div class="form-group">
        <label for="id_email">Your Email</label>
        <input type="email" class="form-control" id="id_email" name="email">
    </div>
    <button type="submit" class="btn btn-primary">Submit</button>
</form>
5. 結論
Django Formsのフィールドとウィジェットはデータを処理し検証し、ユーザーインターフェースを構成する上で重要な役割を果たします。基本提供されるフィールドとウィジェットに加え、必要に応じてカスタマイズしてプロジェクトに適したフォームを設計できます。
次の文章ではバリデーションとフォームのカスタマイズについてさらに深く探っていきます。


コメントはありません。