1. Introduction: Running Deployment Logic in the Background

Hello! In the last part, we set up the staging server environment and created the basic structure of a FastAPI webhook server that receives GitHub webhook requests and verifies the secret. During this process, we included the code for the handle_deploy and should_rebuild functions in the main.py file, giving us a glimpse of the core idea behind the actual deployment logic.
In this part, we will review the operation of the deployment handler logic briefly mentioned in part 3, and focus on how to register this FastAPI webhook server as a Systemd service so that it runs automatically and operates reliably even after server reboots. Your automated deployment system is now ready to be strengthened!
If you haven't seen the previous articles, I recommend reading them first.
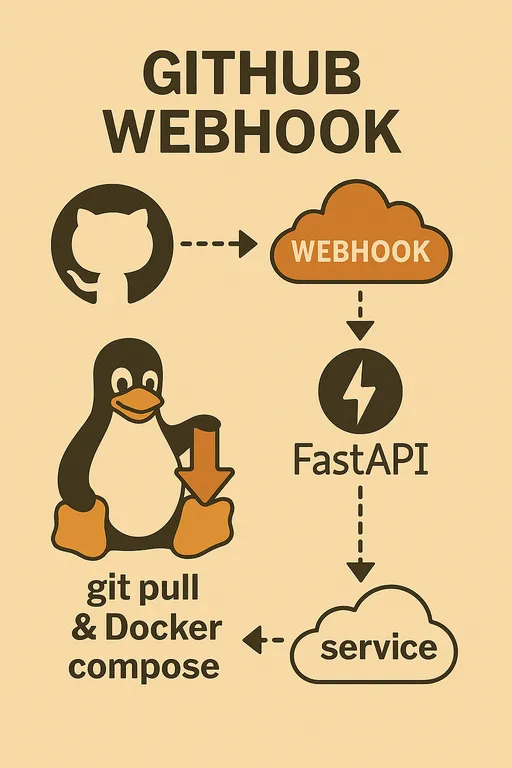
② Overall Architecture and Process Design
③ Setting Up the Staging Server Environment and Basic Construction of the FastAPI Webhook Server
2. Reviewing the Deployment Handler Logic (handle_deploy)
The handle_deploy function from the main.py file we wrote in part 3 is responsible for carrying out the actual deployment work in the background when a GitHub webhook request arrives. This function performs the following key roles.
I recommend looking at the example code from part 3 while following the guide below.
2.1. Managing Multiple Projects and Setting Environment Variables
To manage multiple GitHub repositories (projects) with a single webhook server, we need to inform where each repository is located on the server. The handle_deploy function uses the repo_paths dictionary for this purpose, and these values are designed to be read from the server's environment variables.
Environment variables like SAMPLE_PROJECT_1_PATH appeared in the example code. You need to set the actual paths for each project in the staging server's .env file (this file should be in the same directory as the webhook server's main.py) or in the systemd service file as follows.
Code Snippet
# ~/projects/webhook_server/.env

# GitHub Webhook Secret (set in part 3)
GITHUB_WEBHOOK_SECRET="your_github_webhook_secret_value"

# Actual paths of each project on the server
SAMPLE_PROJECT_1_PATH="/var/www/my-project1"
SAMPLE_PROJECT_2_PATH="/home/user/another-project"
SAMPLE_PROJECT_3_PATH="/opt/third-project"
The handle_deploy function finds the path for the respective project in the repo_paths dictionary using the repository name received from the webhook payload. If there is no mapping found, it leaves a warning Unknown repository and terminates.
Additionally, it includes flexible logic to read additional settings like DEBUG or COLOR from the respective project's .env file (e.g., /var/www/my-project1/.env) to determine whether to select the Docker Compose file (docker-compose.dev.yml or docker-compose.prod.yml) or set the Docker project name, which is very useful for customizing deployment methods according to the project's characteristics.
2.2. Decision to Rebuild Docker Images (should_rebuild)
Rebuilding Docker images every time during deployment is time-consuming and inefficient. The should_rebuild function uses Git's diff command to detect whether crucial files that affect Docker image builds, such as Dockerfile, requirements.txt, or .env files, have changed.
This function checks the changes using the command git diff --name-only HEAD~1 to look for changes since the previous commit, and if any of the modified files are in the predefined trigger_files (e.g., Dockerfile, requirements.txt, .env, REBUILD_TRIGGER, etc.), it returns True to instruct a rebuild.
Notably, the REBUILD_TRIGGER file is a useful trick that can force a rebuild even if the file is empty. This can be utilized when a rebuild of the image is required for reasons other than git pull, after manually creating this file on the server. The should_rebuild function automatically deletes this file upon detection to ensure that unnecessary rebuilds do not occur during the next deployment.
2.3. Executing Git and Docker Compose Commands
The handle_deploy function uses Python's subprocess module to execute git and docker compose commands on the server.
-
subprocess.run(["git", "-C", repo_path, "pull"], check=True): Thecheck=Trueoption raises asubprocess.CalledProcessErrorif an error occurs during the Git command execution, allowing the Python code to detect it and log the error accordingly. The-Coption executes the Git command in the specified directory. -
subprocess.run(["docker", "compose", "-p", project_name, "-f", compose_file, "up", "-d", "--build"], check=True): Based on the result of theshould_rebuildfunction, it either performsup -dor adds the--buildoption to rebuild the image. The-poption specifies the Docker Compose project name to prevent conflicts between multiple projects.
Through this logic, one webhook request can fetch the latest code for a project and update the service efficiently by rebuilding the image only when necessary.
3. Running FastAPI Webhook Server as a Systemd Service
Until now, we have manually executed the webhook server with the command uvicorn main:app --reload. However, this process will disappear when the server is rebooted, and the service will cease to operate when the terminal session is disconnected. To prevent this and ensure stable operation, we need to register the FastAPI webhook server as a Systemd service.
3.1. Why Use Systemd?
-
Automatic Start: The webhook service will start automatically even after a server reboot.
-
Continuous Execution: It runs in the background without being dependent on a terminal session.
-
Easy Management: You can easily start, stop, restart, check the status, and view logs of the service using the
systemctlcommand. -
Resource Efficiency: As explained in part 2, the webhook server itself is a lightweight Python app running via Systemd, while heavy tools like Git or Docker are utilized directly from the system. This avoids unnecessary Docker in Docker setups or increasing container sizes.
3.2. Creating a Systemd Service File (*.service)
A Systemd service is defined through a .service file, which must reside in the /etc/systemd/system/ directory. We will create a file named github-webhook-deployer.service. While I chose a longer name for easier explanation, you may choose a concise yet understandable name.
# Create the file (requires sudo privileges)
sudo nano /etc/systemd/system/github-webhook-deployer.service
File content:
# /etc/systemd/system/github-webhook-deployer.service

[Unit]
Description=GitHub Webhook Deployer Service
After=network.target # This service starts after the network becomes active.

[Service]
User=your_username # The user account that will run this service (e.g., ubuntu, your_user)
Group=your_username # The group that will run this service (e.g., ubuntu, your_user)
WorkingDirectory=/home/your_username/projects/webhook_server # The directory where the FastAPI app is located

# Environment variable settings:
# 1. Since the FastAPI app loads the .env file, variables used within the app such as GITHUB_WEBHOOK_SECRET do not necessarily be loaded with EnvironmentFile. However, if you want to manage all environments consistently at the systemd level, you can maintain the EnvironmentFile= path.
# EnvironmentFile=/home/your_username/projects/webhook_server/.env

# 2. To call system commands like git, docker, docker compose with subprocess.run(), you need to explicitly add paths to where these commands are located in the PATH environment variable. The example PATH below includes typical Linux system paths as well as the bin path of a Python virtual environment. Modify 'your_username' and 'venv' paths to fit your actual environment. Confirm the accurate PATH by checking the server's .bashrc file or using the 'echo $PATH' command to include necessary paths.
Environment="PATH=/home/your_username/projects/webhook_server/venv/bin:/usr/local/sbin:/usr/local/bin:/usr/sbin:/usr/bin:/sbin:/bin"

ExecStart=/home/your_username/projects/webhook_server/venv/bin/uvicorn main:app --host 0.0.0.0 --port 8000 # Use the path for uvicorn in the virtual environment
Restart=always # Restarts the service automatically if it exits.
StandardOutput=journal # Sends standard output to the Systemd journal.
StandardError=journal # Sends standard error to the Systemd journal.

[Install]
WantedBy=multi-user.target # Ensures that the service starts in multi-user mode (normal server boot state).
Explanation:
-
[Unit]Section: Defines general information about the service (description, dependencies).After=network.targetensures that this service starts after the network service has started. -
[Service]Section: Defines how the service will be executed.-
User,Group: The user and group that will run the service. It must be a user with Docker permissions (e.g., set up the user withsudo usermod -aG docker your_username). -
WorkingDirectory: The directory where the FastAPI app'smain.pyfile is located. -
Environment="PATH=...": This part is crucial. When calling external commands likegit,docker,docker composewithsubprocess.run(), the PATH environment variable in the systemd environment may differ from what is set in.bashrc. Therefore, you should explicitly specify the executable path of the virtual environment'suvicornand the system's base executable paths (like/usr/local/bin,/usr/bin, etc.). -
EnvironmentFile(optional): Since the FastAPI app loads the.envfile throughpython-dotenv, environment variables used internally in the app (e.g.,GITHUB_WEBHOOK_SECRET,SAMPLE_PROJECT_N_PATH, etc.) do not need to be loaded through this setting. However, if you wantsystemdto explicitly load these variables before starting the service (to ensure a consistent environment for theuvicornprocess and its subprocesses), usingEnvironmentFileis a valid way. Depending on your environment and preference, you can choose to comment it out or keep it. -
ExecStart: The actual command that starts the service. Make sure to specify the correct path of theuvicornexecutable in the virtual environment.--host 0.0.0.0 --port 8000allows requests coming in on port 8000 from all IPs. -
Restart=always: If the service exits for any reason, Systemd will attempt to restart it automatically. -
StandardOutput=journal,StandardError=journal: Sends all outputs and errors of the service to the integrated logging system of Systemd, known asjournalctl.
-
-
[Install]Section: Defines the target (goal) that activates the service.WantedBy=multi-user.targetensures that this service starts automatically when the server boots up in a typical multi-user state.
3.3. Registering and Starting the Systemd Service
After creating the service file, we need to notify Systemd to recognize the file and start the service.
# Notify Systemd of the new service file.
sudo systemctl daemon-reload

# Set the service to start automatically on boot.
sudo systemctl enable github-webhook-deployer.service

# Start the service.
sudo systemctl start github-webhook-deployer.service

# Check the service status. It should show 'active (running)'.
sudo systemctl status github-webhook-deployer.service
Now your FastAPI webhook server will automatically execute even after server reboots and will reliably await webhook requests in the background.
4. Monitoring and Debugging the FastAPI Webhook Service
Using a Systemd service makes it much easier to check logs and diagnose problems.
- Checking Service Status:
sudo systemctl status github-webhook-deployer.service
This command shows the current status of the service, the last execution time, process ID, etc.
- Checking Logs in Real-Time:
sudo journalctl -u github-webhook-deployer.service -f
The -u option restricts to logs for a specific service, while the -f option outputs new logs continuously in real-time. Whenever a webhook request comes in, the logging messages set in the main.py will appear here.
If the service fails to start or does not operate as expected, you should first check the journalctl logs for error messages.
5. In Conclusion: Preview of the Next Part
In this part, we clarified the operation of the deployment handler logic implemented in part 3 and learned how to register it as a Systemd service for stable operation, one of the most critical steps. Now your webhook server will operate without issues even after server reboots.
In the next part, we will complete the final pieces of the puzzle to finish the system. We will cover how to set up Nginx as a reverse proxy to securely expose the webhook server to the outside, apply HTTPS to enhance security, and finally integrate webhooks with the GitHub repository to test the actual automated deployment. Stay tuned!


There are no comments.