Introduction: Understanding the Big Picture is Important

Hello! In the first part, we discussed the reasons for wanting to build an automated deployment system using GitHub Webhook and the necessary preparations. In this second part, before diving into the actual code implementation, we will take some time to design the overall architecture and processes for the automated deployment system we are going to create.
Your development environments may vary slightly. Some may use Raspberry Pi, while others may use cloud VPS, and the structure of the projects being deployed will also differ. To build a system flexibly in such diverse environments and to resolve any issues that arise on your own, understanding the overall flow and context is paramount, beyond just the specific codes.
Through this section, let’s visualize the big picture of the system we’re going to build and clearly understand the roles of each component.
Automated Deployment Workflow: Overview of the Entire Flow
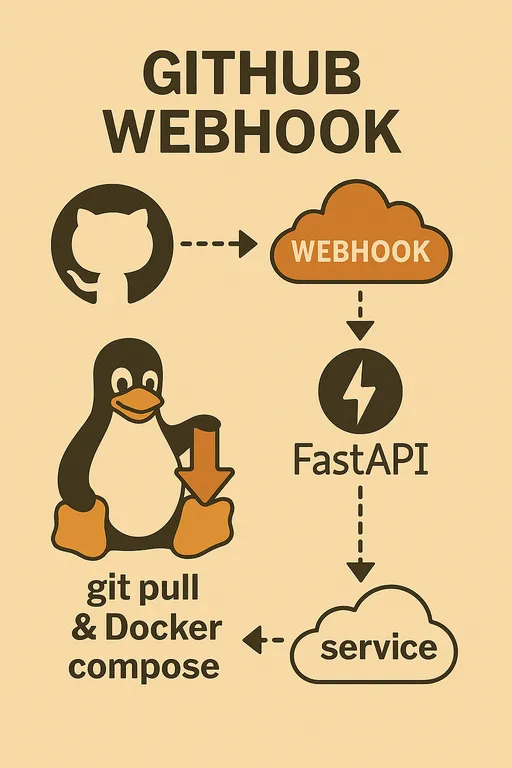
The automated deployment system we will implement operates through the following series of steps.
-
Code Changes and Git Push from Local Work Machine: The developer modifies the code in their local environment and pushes the changes to a specific branch of the GitHub repository (e.g.,
mainordevelop). -
Webhook Event Trigger from GitHub Repository: The GitHub repository sends an HTTP POST request to a specified URL through a pre-configured webhook when a
pushevent is detected. -
Request Sent to Webhook Endpoint of the Staging Server: The webhook request sent by GitHub points to a specific URL of our prepared staging server (e.g.,
https://deployer.example.com/webhook). This request contains various payload data, including pushed commit information and the list of modified files. -
Receiving Webhook on the Staging Server's FastAPI Service: Our FastAPI application running on the staging server receives this webhook request. This is where the role of the FastAPI service begins.
Core Functions of the FastAPI Webhook Service
The webhook service we implement using FastAPI will perform several important roles beyond just receiving requests.
Receiving and Initial Processing of Webhook
The FastAPI application provides an endpoint (e.g., /webhook) capable of receiving HTTP POST requests from GitHub. This endpoint parses the HTTP headers and body (Payload) of the request to extract the necessary information.
Secret Validation
Security is of utmost importance in an automated deployment system. GitHub Webhook provides a Secret value that can validate the integrity of the request through the X-Hub-Signature-256 header. Our FastAPI service must include logic to verify whether the request sent by GitHub is legitimate and not tampered with. If this validation fails, the request will be immediately rejected to prevent unauthorized access.
Immediate Response and Background Tasks
If GitHub does not receive a response within a certain amount of time (default 10 seconds) after sending a request, it considers it a timeout and either retries or records a failure. However, the actual deployment process (Git Pull, Docker build/restart, etc.) can take a considerable amount of time.
Thus, our FastAPI service will send an immediate 200 OK response to GitHub right after completing initial processing like the Secret validation. The actual deployment logic will be designed to run asynchronously in the background using FastAPI's BackgroundTasks feature. This way, we can avoid GitHub's timeout issues while conducting deployment tasks reliably.
Deployment Handler Logic in Detail
The deployment handler that runs in the background will carry out several key operations.
Managing Multiple Projects: Reading Repository Paths
We will design it so that a single FastAPI webhook service can handle automated deployments for multiple GitHub repositories (projects). To achieve this, we will manage the paths to each project's GitHub repository and the local paths within the server where they will be deployed, through environment variables or configuration files. After confirming which repository the event occurred in the webhook payload, we will navigate to that project's path and carry out the deployment.
Custom Settings per Project: Parsing the .env File (Optional)
Each project may have unique environment variables or configuration values necessary for building or deploying. For instance, specific Docker image tags, build options, service restart commands, etc., can differ. To manage these efficiently, we will implement the ability to parse the necessary values from the .env file located in each project’s local repository so that they can be utilized in the deployment logic. This will be greatly beneficial in creating flexible and customized deployment logic.
Code Updates: Executing git pull
This is the most fundamental step. We will use the subprocess module to execute the git pull origin <branch_name> command in the respective project’s local repository to fetch the latest code from the GitHub repository.
Deciding to Rebuild the Docker Image: Using git diff
For Docker-based projects, just running docker compose up -d is sufficient when only code changes. However, if files that affect the Docker image build, such as Dockerfile or requirements.txt (in Python projects), have changed, the image must be rebuilt.
We will use the git diff command to determine whether there are any changes to the Dockerfile or other build-related files between the most recently pushed commit and the previous commit. If changes are detected, we will execute docker compose up -d --build, otherwise, we will simply run docker compose up -d to avoid unnecessary image rebuilding and to reduce deployment time.
Running Docker Compose: Using the subprocess Module
After fetching the latest code and deciding whether or not to rebuild the image, we will use the subprocess module to execute either docker compose up -d or docker compose up -d --build to update the Docker containers to the latest state and restart the services.
Logging: Recording All Processes
All deployment processes (webhook reception, validation, Git Pull results, Docker build/restart logs, etc.) should be thoroughly recorded. This is essential for identifying causes and debugging when problems occur. We will implement logging to a file using Python's logging module.
Deployment and Operational Strategy for FastAPI Service
The FastAPI webhook service we implement needs to run reliably on the staging server at all times.
Importance of Utilizing Systemd Service
Instead of running the FastAPI application directly in a Docker container, I strongly recommend running it as a Systemd Service for the following reasons.
-
Resource Efficiency: It is highly likely that tools necessary for deployment, such as
git,docker, anddocker compose, are already installed on the staging server. Making the FastAPI webhook service a Docker container and then installinggitordockerinside that container to control the system’sdockerdaemon unnecessarily increases the size of the container and could lead to complex setups and security issues likedocker-in-dockerordocker-out-of-docker. -
Simplified Management: Systemd is the standard for service management in Linux systems. Registering the FastAPI app as a Systemd service allows for integrated and concise management at the OS level, such as automatic starting during server boot, checking service status, and easily restarting/stopping the service.
-
Utilization of System Resources: Running the FastAPI app through Systemd allows it to directly call the
gitanddockercommands installed on the system for performing deployment tasks, thereby utilizing the system's existing resources most efficiently.
In the next part, we will elaborate on how to register and manage the FastAPI application as a Systemd service.
Reverse Proxy and HTTPS via Nginx/Apache2
As emphasized in the first part, directly exposing the FastAPI application to the internet is very risky from a security perspective. Therefore, we will use a web server like Nginx or Apache2 as a Reverse Proxy to safely relay webhook requests to the FastAPI application.
Additionally, since GitHub Webhook strongly recommends HTTPS communication, we need to prepare a dedicated subdomain like deployer.example.com and apply for an HTTPS certificate via Let's Encrypt, amongst others, to the web server. This way, all communications from external sources will be encrypted, enhancing security.
Monitoring and Debugging
We will utilize the following two methods to check whether the automated deployment system is functioning correctly and to identify causes when issues arise.
-
FastAPI Service Log Files: The FastAPI service we implement will log every step of the deployment process in its own log file. By checking this file, we can determine the success of the deployment and any error messages that occurred.
-
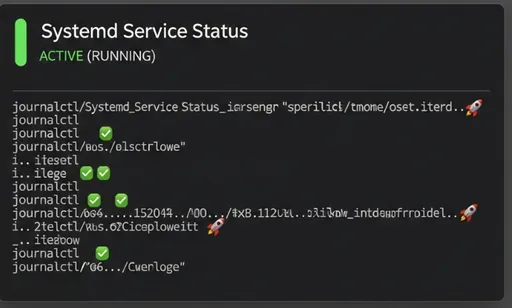
Systemd
journalctl: Since we manage FastAPI services with Systemd, we can check and analyze the standard output and error logs of the service in real-time through the commandjournalctl -u your-fastapi-service.service.
Conclusion: Preview of Next Part
In this second part, we detailed the overall architecture of the automated deployment system using GitHub Webhook, the core functions of the FastAPI service, and the deployment and operational strategies. I hope you now have a clear picture in your mind.
In the next third part, we will cover the specific implementation process of writing the code for the FastAPI webhook service, setting up the GitHub Webhook, and registering it as a Systemd service based on the design we created today. Stay tuned!
Series on Building My Automated Deployment System Using GitHub Webhook


There are no comments.