Introduction: The Importance of CI/CD and Automated Deployment

Automated deployment for an efficient development workflow, known as CI/CD (Continuous Integration/Continuous Delivery), has become a necessity rather than just an option. When code is pushed to GitHub, if the build-test-deploy process is automated, it can significantly enhance development productivity.
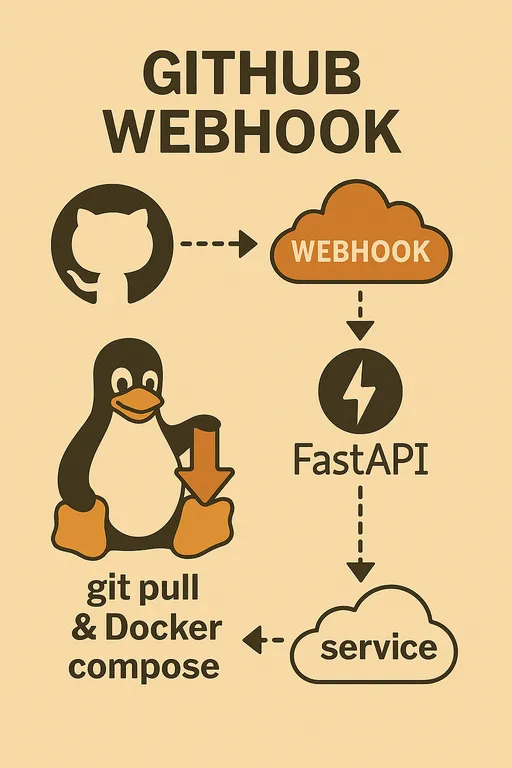
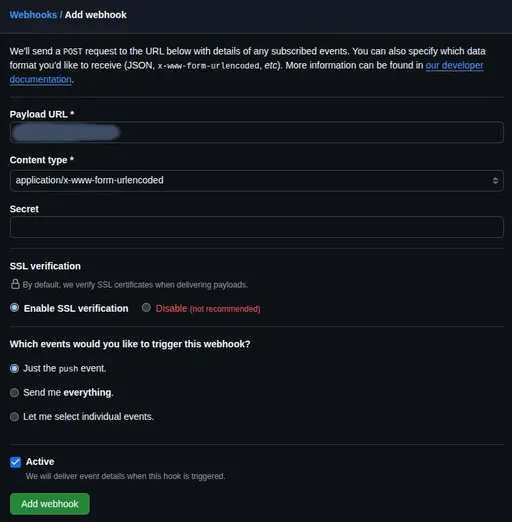
There are various ways to implement this automated deployment, notably utilizing GitHub Actions provided directly by GitHub or using GitHub's Webhook feature to implement the deployment logic yourself.
Why Implement Webhook Yourself Instead of Using GitHub Actions?
GitHub Actions is undoubtedly a powerful and convenient CI/CD tool. You can define complex workflows in just a few lines of YAML and automate various processes like building, testing, and deploying through diverse action marketplaces. It cannot be denied that GitHub Actions is an excellent option for most projects.
However, GitHub Actions is not the optimal choice in every case. If developers find themselves in the following situations, implementing deployment logic via GitHub Webhook may be more attractive.
-
Cost-sensitive individual developers or small teams: While GitHub Actions is almost limitless and free for public repositories, it incurs charges exceeding a certain amount of free quota (minutes and storage) for private repositories. If you want to completely avoid unexpected costs, implementing it yourself is the answer.
-
Developers operating their own staging servers like Raspberry Pi 5: If you already have a physical server (including VPS and cloud instances), it is more efficient to utilize the resources of your own server rather than renting GitHub's virtual environment (Runner). Receiving and deploying code directly on your server is cost-effective and advantageous in terms of resource utilization.
-
Developers wanting complete control and freedom over the deployment logic: While GitHub Actions utilizes standardized workflows and actions, implementing webhooks directly allows you to design and control every aspect of the deployment scripts as you wish. This approach excels when there is a need for complex custom logic specific to certain environments or perfect integration with already established pipelines.
In this series, we will detail how to implement deployment logic directly on my server using GitHub Webhook for such individuals. We will target Python developers, planning to use the simple yet powerful web framework FastAPI to build the Webhook endpoint. While DRF (Django REST Framework) is also an excellent choice, FastAPI is considered the optimal selection here since it involves a very lightweight logic for simply handling Webhook requests. Just like you don’t need to drive a sports car just to go grocery shopping, a compact car is sufficient.
Basic Requirements for Building an Automated Deployment System
We will start the actual implementation in the next issue. In this installment, I will outline the preparations necessary for smooth progress.
-
GitHub Repository:
-
A GitHub repository containing the Python project to which automated deployment will be applied is needed. (It can be public or private)
-
The deployment will be triggered every time code is pushed to this repository.
-
-
Staging Server (Self-hosted Server):
-
A server where the actual deployment will occur is required. Anything from Raspberry Pi 5, personal VPS (Virtual Private Server), to cloud instances (AWS EC2, GCP Compute Engine, etc.) is fine.
-
You must be able to access it externally (from GitHub) through a public IP address or domain. (Pay attention to firewall settings.)
-
A Linux environment such as Ubuntu Server is recommended for the operating system.
-
Docker Installation: Docker must be pre-installed on the server so that the deployed application can be built or run based on Docker containers.
-
-
Python Development Environment:
- Python version 3.8 or higher must be installed on the staging server. (Using a virtual environment is recommended)
-
Git:
- Git must be installed on the staging server. It will be used to pull the latest code from the GitHub repository using the
git pullcommand.
- Git must be installed on the staging server. It will be used to pull the latest code from the GitHub repository using the
-
FastAPI and Uvicorn:
- The framework FastAPI is needed for implementing the Python webhook endpoint, along with the ASGI server Uvicorn. We will cover installation and basic setup in the next issue.
-
SSH Key:
- SSH key setup is required to access the GitHub repository securely from the staging server to fetch code. Most likely, your SSH key is already registered in your account. (If you haven't registered yet, make sure to do so on GitHub. Using a deployment key
Deploy keyis common practice.)
- SSH key setup is required to access the GitHub repository securely from the staging server to fetch code. Most likely, your SSH key is already registered in your account. (If you haven't registered yet, make sure to do so on GitHub. Using a deployment key
-
Understanding of Web Server (Nginx or Apache2) and Domain/HTTPS Configuration:
-
GitHub Webhook generally recommends secure communication over HTTPS. Therefore, it is strongly recommended to prepare a subdomain like
deployer.example.comto receive the webhook and acquire and apply an HTTPS certificate (e.g., a free certificate through Let's Encrypt) for this domain. -
While I doubt anyone connects their FastAPI application directly with port forwarding through an ISP's router, I’d like to add that it is generally safer to use a web server like Nginx or Apache2 as a Reverse Proxy to relay webhook requests to the FastAPI application rather than exposing the application directly. Having a basic understanding and experience with setting this up will be very helpful.
-
-
Understanding of Systemd Service (optional but recommended):
-
The FastAPI webhook server should always reside on the staging server and run. It is recommended to register it as a Systemd Service for easy starting, stopping, and restarting, even after server reboots.
-
Note: Attempting to execute
gitordockercommands directly inside a Docker container for complex deployment logic is counterproductive to container design purposes, requiring complicated setups likedocker-in-dockerordocker-out-of-docker, which are not secure. Ifgitanddockerare already installed on the server, it is far more efficient and straightforward to run the FastAPI webhook server lightly as a Systemd Service and utilize systemgitanddockercommands directly in the deployment scripts. This series will focus on this approach.
-
Now all the preparations are complete. In the next installment, we will detail how to build the FastAPI webhook endpoint on the prepared staging server and set up the GitHub Webhook to successfully execute the first automated deployment. Stay tuned!

There are no comments.