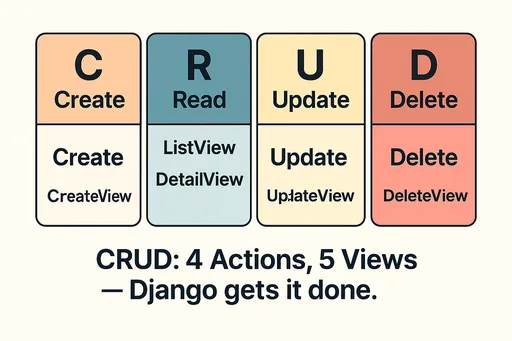
This post is the 5th part of the Django Class-Based Views (CBV) series, covering how to easily implement CRUD using CreateView, UpdateView, and DeleteView. When combined with the ListView and DetailView discussed in the previous article, you can quickly set up a complete CRUD application that supports data retrieval, as well as creation (Create), modification (Update), and deletion (Delete).
If you haven’t read the previous articles on ListView and DetailView, I recommend starting with those.
Exploring Class-Based Views (CBV) Series ④ - How to Use ListView & DetailView
“Effortlessly complete CRUD with Django generic views and maximize your productivity!”
In previous posts, we focused on the basic structure of CBVs and the READ operations through ListView and DetailView.
In this article, we will systematically explore Django's convenient CreateView, UpdateView, and DeleteView, to create a web application equipped with creation (Create), modification (Update), and deletion (Delete) functionalities.
1. CreateView – Creating Data

1.1 Basic Concepts and Structure
CreateView is a class specialized for “creating new objects” among Django's generic views.
-
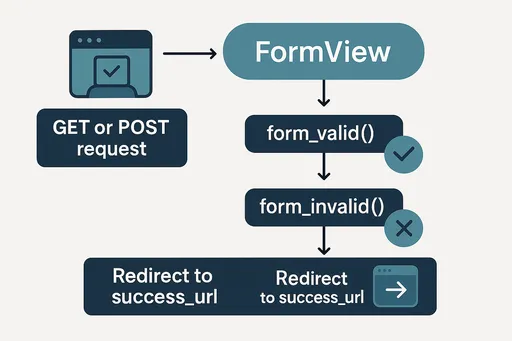
Automated form processing: It internally utilizes the
FormViewfunctionality to save the new object withinform_valid()and redirect to a URL upon success. -
Works well with ModelForm: When you specify the
modelattribute andfields, orform_class, the form is automatically created and processed.
# views.py
from django.views.generic.edit import CreateView
from django.urls import reverse_lazy
from .models import Post

class PostCreateView(CreateView):
    model = Post
    fields = ['title', 'content']  # or form_class = PostForm
    template_name = 'post_form.html'
    success_url = reverse_lazy('post_list')  # URL to redirect after successful creation
1.2 Example Connection in urls.py
# urls.py
from django.urls import path
from .views import PostCreateView

urlpatterns = [
    path('posts/create/', PostCreateView.as_view(), name='post_create'),
]
1.3 Example Template: post_form.html
<!DOCTYPE html>
<html>
<head>
    <title>Create New Post</title>
</head>
<body>
    <h1>Create a New Post</h1>
    <form method="post">
        {% csrf_token %}
        {{ form.as_p }}
        <button type="submit">Save</button>
    </form>
</body>
</html>
Tip: If you use
form_classinstead offields, you can defineModelForminforms.pyto control the form more precisely.
2. UpdateView – Modifying Data
2.1 Basic Concepts and Structure
UpdateView is a generic view specialized in finding and modifying an existing object.
-
It automatically retrieves the specified object using the pk or slug value in the URL.
-
The form is rendered with existing data filled in, and when the user submits after modifying, changes are saved to the database.
# views.py
from django.views.generic.edit import UpdateView
from django.urls import reverse_lazy
from .models import Post

class PostUpdateView(UpdateView):
    model = Post
    fields = ['title', 'content']
    template_name = 'post_form.html'
    success_url = reverse_lazy('post_list')  # URL to redirect after successful update
2.2 Example Connection in urls.py
# urls.py
from .views import PostUpdateView

urlpatterns = [
    path('posts/<int:pk>/edit/', PostUpdateView.as_view(), name='post_update'),
]
2.3 Example Template (Reusable)
Similar to CreateView, you can reuse the post_form.html template.
In UpdateView, since form.instance is already a stored object in the DB, existing data is auto-filled in the form.
3. DeleteView – Deleting Data
3.1 Basic Concepts and Structure
DeleteView is a generic view used to find and delete a specific object.
-
When the user submits the deletion confirmation form, the object is removed from the DB and redirected to the specified URL.
-
It is recommended to create a template for the “deletion confirmation” for security reasons.
# views.py
from django.views.generic.edit import DeleteView
from django.urls import reverse_lazy
from .models import Post

class PostDeleteView(DeleteView):
    model = Post
    template_name = 'post_confirm_delete.html'
    success_url = reverse_lazy('post_list')
3.2 Example Connection in urls.py
# urls.py
from .views import PostDeleteView

urlpatterns = [
    path('posts/<int:pk>/delete/', PostDeleteView.as_view(), name='post_delete'),
]
3.3 Example Template: post_confirm_delete.html
<!DOCTYPE html>
<html>
<head>
    <title>Delete Post</title>
</head>
<body>
    <h1>Delete Post</h1>
    <p>Are you sure you want to delete this post?</p>
    <form method="post">
        {% csrf_token %}
        <button type="submit">Delete</button>
        <a href="{% url 'post_list' %}">Cancel</a>
    </form>
</body>
</html>
Note: DeleteView is designed to go through a “deletion confirmation” process to prevent accidental deletions by users.
If you want to delete immediately, you need to implement it via another method (e.g., FormView or custom logic).
4. Overview of the CRUD Completion Flow
4.1 Example Model: Post
# models.py
class Post(models.Model):
    title = models.CharField(max_length=200)
    content = models.TextField()
    created_at = models.DateTimeField(auto_now_add=True)
    def __str__(self):
        return self.title
4.2 urlpatterns (Simplified Version)
urlpatterns = [
    # 1) READ
    path('posts/', PostListView.as_view(), name='post_list'),                   # List (ListView)
    path('posts/<int:pk>/', PostDetailView.as_view(), name='post_detail'),      # Detail (DetailView)

    # 2) CREATE
    path('posts/create/', PostCreateView.as_view(), name='post_create'),

    # 3) UPDATE
    path('posts/<int:pk>/edit/', PostUpdateView.as_view(), name='post_update'),

    # 4) DELETE
    path('posts/<int:pk>/delete/', PostDeleteView.as_view(), name='post_delete'),
]
4.3 Recommended Folder Structure and Template Files
-
templates/-
post_list.html -
post_detail.html -
post_form.html(Shared between CreateView and UpdateView) -
post_confirm_delete.html(DeleteView)
-
5. Customizing Create/Update/DeleteView
5.1 Fine Control of Forms with form_class
class PostCreateView(CreateView):
    model = Post
    form_class = PostForm  # Specify the ModelForm
    ...
In PostForm, you can set field validation or widget specification in detail for more flexible form handling.
5.2 Dynamic Redirection with get_success_url()
def get_success_url(self):
    # Example: Redirect to detail page using the pk of the newly created Post
    return reverse_lazy('post_detail', kwargs={'pk': self.object.pk})
self.object refers to the model instance being processed in the current Create/Update operation.
5.3 Control Access with Mixins
-
You can combine with LoginRequiredMixin to make it so that only logged-in users can create/update/delete.
-
If you want to manage permissions in detail, consider using PermissionRequiredMixin or UserPassesTestMixin.
6. Comparison with FBV
| Function | FBV (Function-Based Views) | Create/Update/DeleteView (Class-Based Views) |
|---|---|---|
| Creation (Create) | request.method == 'POST' condition, define ModelForm directly, write save logic manually |
CreateView: Inherit and form creation→saving→redirect is handled automatically |
| Modification (Update) | Fetch the existing object, put in the form, repeat validation and save logic on POST | UpdateView: Load existing object→modify→save, automate logic |
| Deletion (Delete) | GET→render deletion confirmation page, POST→handle deletion, redirect logic all mixed in one function | DeleteView: Fetch target object for deletion, built-in logic for handling deletion and redirection |
| Readability / Maintainability | Logic branching can make the code lengthy, duplicating logic in multiple places | Method overriding allows you to redefine only necessary parts, minimizing duplication |
| Developer Productivity (Key Comments) | “Labor-intensive, time-consuming, code duplication” | “Improved development speed (Time-saving) and maintenance (Productivity boost)” |

7. Conclusion: Let’s implement CRUD quickly and cleanly with Generic Views!
By using CreateView, UpdateView, and DeleteView, you can accomplish CRUD tasks in Django with extremely concise and intuitive code.
Especially, since duplicate form handling logic, and redirect after data saving patterns are processed automatically, developers can focus on the “business logic” and “UI/UX.”
Now that you understand
ListView+DetailView+CreateView+UpdateView+DeleteView, you can easily set up a basic CRUD application in Django!
In the next post, we will cover TemplateView & RedirectView and explore how to smoothly automate simple page rendering and redirection.
Revisit Previous Posts
-
Exploring Class-Based Views (CBV) Series #2 – Understanding Django's Basic View Class
-
Exploring Class-Based Views (CBV) Series #3 – Easily Handling Forms with FormView
-
Exploring Class-Based Views (CBV) Series #4 – How to Use ListView & DetailView
“Utilize Django's generic views to automate CRUD implementation and elevate both project development speed and code quality!”


There are no comments.