In the previous post, we prepared for secure SSH access through SSH key generation.
View the previous post: SSH keygen: A Complete Guide for Beginners
Now it's time to learn how to actually connect to a remote server using SSH. The SSH command is simpler than you might think, but you can use it much more efficiently if you know a few principles and useful options.
How to Write SSH Commands?
The basic format of an SSH command is as follows:
ssh [options] [username]@[hostname] [command]
Let’s take a closer look at what each of these elements means.
-
ssh: The command that runs the SSH client. -
[options]: Various options that control the SSH connection method can be specified. For example, you can use a specific key file or set up port forwarding. (We’ll cover this in detail later.) -
[username]: The username of the account on the remote server you want to connect to. If the username on your local computer is the same as the one on the remote server, you can omit this. -
[hostname]: The IP address or domain name of the remote server you want to connect to. -
[command](optional): If you have a command you want to execute immediately on the remote server after connecting via SSH, enter it here. After this command is executed, the SSH session will close. If omitted, you can log into the server and use an interactive shell.
Principles for Writing Commands and Easy-to-Remember Tips
The SSH command structure clearly indicates “which user is connecting to which server.”
-
Basic Principle:
ssh username@hostname- Example:
ssh ubuntu@192.168.1.100(connecting as theubuntuaccount to the 192.168.1.100 server) - Example:
ssh root@mywebserver.com(connecting as therootaccount to the https://www.google.com/search?q=mywebserver.com server) -
Easy to Remember Tip:
-
Think: “I (the local user) want to connect to someone (remote user) over there (remote server)!”
ssh(I want to connect)[username]@(as whom)[hostname](to where)- For frequently accessed servers, you can create an alias using the
~/.ssh/configfile, making it convenient to connect without entering the full address each time. (We’ll cover this in more detail in the next post!)
- Example:
Exploring Useful SSH Options
SSH provides powerful features through various options tailored for multiple situations. Here are some key options to introduce you to.

1. -i <IdentityFile>: Specify a specific private key file
This is used when you have multiple SSH keys and want to use a specific private key to connect to a particular server. By default, the ~/.ssh/id_rsa or ~/.ssh/id_ed25519 is used, but it is useful when you have generated under a different name or are managing multiple keys.
- Usage:
ssh -i ~/.ssh/my_custom_key ubuntu@my_server.com -
Example:
ssh -i ~/.ssh/id_ed25519_my_server ubuntu@example.com
    Enter passphrase for key '/home/youruser/.ssh/id_ed25519_my_server':
2. -p <Port>: Specify the SSH port of the remote server
Most SSH servers use port 22 by default. However, for security reasons, administrators often change the SSH port. In such cases, you need to specify the changed port number using the -p option.
- Usage:
ssh -p 2222 your_user@your_server.com(connect to port 2222) -
Example:
ssh -p 2222 myuser@192.168.1.100
	The authenticity of host '192.168.1.100:2222 (...)' can't be established.
	Are you sure you want to continue connecting (yes1/no/[fingerprint])? yes
	Warning: Permanently added '192.168.1.100:2222' (ED25519) to the list of known hosts.
	Last login: Mon Jun 17 10:00:00 2024 from your_ip
	myuser@server:~ $
3. -X: Enable X11 forwarding (run graphical programs)
This is used when you want to run a GUI (Graphical User Interface) application installed on a remote server and display it on your local computer. It uses the X Window System, and an X server must be running on the local system (XQuartz for macOS, PuTTY + VcXsrv for Windows, etc.).
- Usage:
ssh -X your_user@your_server.com -
Example:
    ssh -X myuser@remote-gui-server.com
    myuser@remote-gui-server:~ $ firefox &
After connecting, run firefox on the remote server (the firefox window will appear on your local screen).
Performance can be poor or there might be significant network lag.
4. -L <LocalPort>:<RemoteHost>:<RemotePort>: Local port forwarding
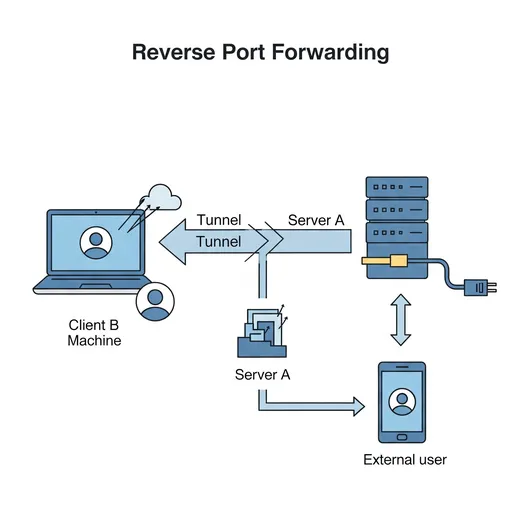
This function forwards connections coming to a specific port (LocalPort) on your local computer through an SSH tunnel to a specific port (RemotePort) on the remote server (RemoteHost). It's useful for connecting to services behind a firewall or when an application developed locally needs to access a remote database.
- Usage:
ssh -L 8080:localhost:80 your_user@your_server.com- This command forwards all connections coming to the local computer's port 8080 to port 80 on
your_server.comthroughyour_server.comitself (wherelocalhost:80refers toyour_server.com).
- This command forwards all connections coming to the local computer's port 8080 to port 80 on
-
Example:
-
When you cannot directly access the web server (port 80) on a remote server and only SSH is possible:
ssh -L 8080:localhost:80 myuser@my_web_server.comAfter executing this command, visiting http://localhost:8080 on your local web browser will give
the same effect as accessing port 80 on my_web_server.com. -
If
my_db_appneeds to connect to the MySQL port 3306 on the remotedb_server.internal, butdb_server.internalis only accessible viamy_app_server.com:ssh -L 3307:db_server.internal:3306 myuser@my_app_server.comAfter executing this command, if
my_db_appconnects to localhost:3307,
it will access port 3306 on db_server.internal via my_app_server.com.-
(The reason for using port 3307 is that there may already be a MySQL instance using port 3306 locally.)
-
-
5. -N: Keep port forwarding only without executing a remote command
This option is used along with -L or -D (Dynamic Port Forwarding, SOCKS proxy) to keep the SSH session open without executing shell commands on the remote server, solely maintaining port forwarding. It is primarily used to maintain port forwarding tunnels in the background.
- Usage:
ssh -N -L 8080:localhost:80 your_user@your_server.com -
Example:
ssh -N -L 8080:localhost:80 myuser@my_web_server.com &Opens a port forwarding tunnel in the background (&), allowing access from a web browser locally.
6. -f: Switch the SSH session to the background
This option sends the SSH client process to the background after a successful SSH connection. It is commonly used with the -N option to maintain the port forwarding tunnel in the background.
- Usage:
ssh -f -N -L 8080:localhost:80 your_user@your_server.com -
Example:
ssh -f -N -L 8080:localhost:80 myuser@my_web_server.comThis command immediately returns terminal control, and the SSH tunnel runs in the background.
You can check the process with the command ps aux | grep ssh.
Conclusion
In this post, we examined the basic structure of the SSH command along with commonly used key options. I highly recommend mastering port specification using -p and port forwarding using -L, as these are frequently utilized in practical applications.
In the next post, we’ll explore how to conveniently manage SSH connections by utilizing the ~/.ssh/config file. If you have any questions, feel free to leave a comment!


There are no comments.