Thank you for your love towards the SSH-related posts on my blog. The statistics show that many of you are interested in SSH, but it seems there’s a lack of a comprehensive guide on how to configure it securely from the ground up.
SSH (Secure Shell) is not just a remote access tool. For developers, it’s a lifeline for server management, and for regular users, it’s a powerful weapon that allows access to their computer anytime, anywhere.
Today, I will go beyond the basic concepts of SSH and outline how to "properly" start with the essential security settings and know-how that practitioners must adhere to.
1. What is SSH and Why is it Essential?

SSH stands for Secure Shell, a protocol that allows you to log in to another computer on the network, execute commands, and transfer files. The key feature is 'encryption'. Unlike traditional Telnet, all communication content is encrypted during transmission, so even if someone intercepts the data in between, they cannot read its contents.
-
Developers: It’s essential for deploying and managing cloud servers like AWS and Azure.
-
Non-developers: You can safely manage your PC, NAS, Raspberry Pi, etc., from outside your home.
2. Server (Remote) Setup: The First Step to Security
Installing openssh-server on the server (remote location) is just the beginning. Using the default settings immediately after installation makes it very vulnerable in terms of security.
The location of the configuration file is /etc/ssh/sshd_config in Linux. You need to modify this file to establish at least a minimal safety net.
Modify the Configuration File:
sudo nano /etc/ssh/sshd_config
Practical Setting 1: Change the Default Port
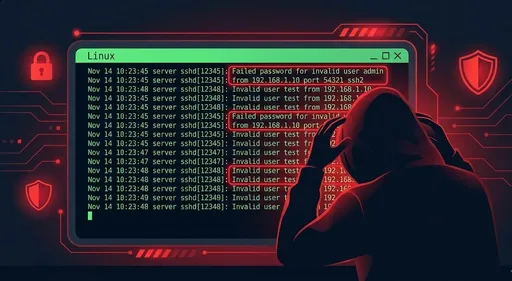
SSH uses port 22 worldwide. Automated bots used by hackers primarily target port 22. Just changing the port number can help avoid over 90% of brute force attacks.
# Port 22  <-- comment out or delete
Port 22022  # It is recommended to use a random port number after 1024
Practical Setting 2: Disable Password Authentication
Passwords can eventually be cracked. You should use the much more secure SSH Key method, and once the key setup is complete, you must disable password access entirely.
PasswordAuthentication no
⚠️ Note: This setting must be applied after confirming that SSH key access is functioning correctly. Otherwise, you may completely lock yourself out of the server.
3. Local (Client) Setup: Key Generation and Registration Know-How
Now it's time to create the key to access the server from my PC (local). From here on, some know-how is needed from seasoned users.
Know-How 1: Generate Identifiable Keys (-C Option)
When generating keys, don’t just type ssh-keygen. As your keys accumulate, it becomes difficult to distinguish which key is used where. Always use the Comment option.
# -t ed25519: Latest encryption method (excellent speed and security)
# -C: Adds a comment at the end of the key file for identification.
ssh-keygen -t ed25519 -C "my-macbook-pro-home-server-key"
The generated key will be stored in the ~/.ssh/ directory. (id_ed25519: private key, id_ed25519.pub: public key)
Know-How 2: The Easiest Key Copy Method (ssh-copy-id)
You need to register the public key (pub) with the server. Finish it off with a single command instead of the hassle of copying and pasting text.
# Syntax: ssh-copy-id -i [path_to_public_key] [user]@[server_address] -p [port]
ssh-copy-id -i ~/.ssh/id_ed25519.pub user@192.168.1.100 -p 22022

# If the server is connected to a DNS domain, you can use DNS directly instead of an IP.
ssh-copy-id -i ~/.ssh/id_ed25519.pub alice@wonderland.com -p 22022
This command automatically appends your public key to the server's ~/.ssh/authorized_keys file.
Know-How 3: Important Points When Registering Manually (Permission Issues)
If you must register manually because ssh-copy-id is not available, pay close attention to file permissions. SSH will refuse connections if permissions are too open for security reasons.
After connecting to the server, check the following in your home directory:
-
.sshFolder: Permission700(read/write/execute for the user only) -
authorized_keysFile: Permission600(read/write for the user only)
chmod 700 ~/.ssh
chmod 600 ~/.ssh/authorized_keys
If you want to know more about file permissions in the Linux filesystem, click here for more details!
4. Connection Testing and Next Steps
Once all preparations are complete, try to connect. Since you changed the port, you'll need to use the -p option.
ssh -p 22022 user@192.168.1.100
# It doesn’t matter if it’s a LAN IP, WAN IP, or DNS domain; as long as it clearly points to the server, that’s fine.
If you can connect directly without being asked for a password, congratulations, you’ve succeeded. Now complete the security by setting PasswordAuthentication no in the server's sshd_config.

Now you have an environment to safely control your server. However, the world of SSH is vast. Learn how to automate connections, manage files, and integrate stronger security tools in the following articles.
📖 Recommended Advanced Guides
-
SSH Usage: A Complete Mastery from Command Writing to Useful Options!
-
The First Step to SSH Connection Automation: Mastering the Config File
-
SSH Reverse Port Forwarding: The Magic of Connecting from External to Internal (feat. -R option)
-
Managing Server Files via SSH without a Terminal: Utilizing SFTP and GUI File Explorers!
In the next post, I will address the commonly confusing SSH Config file, explaining how to connect to a server with just one word without complicated options. Additionally, if you found this helpful, please check out other articles as well!


There are no comments.