## The Heart of [[HTMX]]: Triggers and Advanced Control Techniques {#sec-f4f92dc347e1}
In previous articles, we explored the basic methods for sending requests to the server using [[HTMX]]. We saw how attributes like `hx-get`, `hx-post`, `hx-put`, and `hx-delete` allow you to implement a significant number of Ajax operations without needing JavaScript's `fetch()`.
However, as you use HTMX, you'll often want to control **not just *what* request is sent, but *when* it's sent**. This is where `hx-trigger` comes into play.
If `hx-get` or `hx-post` defines **"what to do,"** then `hx-trigger` defines **"when to do it."**
Without `hx-trigger`, HTMX might seem like a simple Ajax tool that only sends requests when a button is clicked. However, your satisfaction with HTMX will significantly increase once you start using `hx-trigger`.
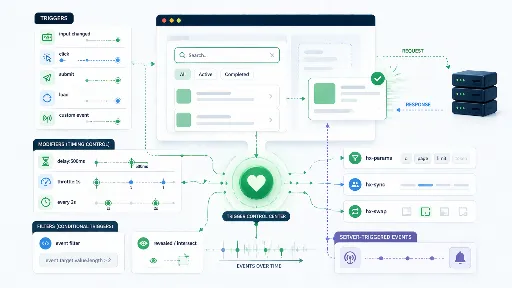
For instance, the following actions become possible without any JavaScript code:
- Send search requests only after input has stopped.
- Prevent duplicate clicks within a short period.
- Automatically refresh at regular intervals.
- Load elements only when they appear on screen.
- Send requests only under specific conditions.
- Adjust priorities to prevent conflicts between different requests.
Initially, I thought, "Why bother with [[HTMX]] when a few lines of `fetch` would suffice?" and viewed HTMX merely as an Ajax tool. However, my perspective completely changed after experiencing the powerful control features of `hx-trigger`.
In this article, I'll summarize **triggers and advanced control techniques**, which can be considered the true core of HTMX.
---
## [[HTMX]] Is More Than Just a Button Tool {#sec-31cdd005939f}
When first introduced to HTMX, people typically start with examples like this:
```html
```
At this level, HTMX might simply feel like a "tool that sends Ajax requests when a button is clicked."
While that alone is quite convenient, it's only a part of what HTMX offers.
What's truly important is **not just the request itself, but the ability to declare the timing and conditions under which that request occurs directly in HTML.**
For example:
- Sending a server request with every keystroke in a search bar results in a terrible UX. Conversely, if requests are sent only 500ms after input stops, the experience would be much smoother.
- You might want a button to activate not just on a simple click, but **only when clicked while holding down the Ctrl key.**
- Or, you might want to fetch data only when a specific element becomes visible after scrolling down.
If you start writing JavaScript directly for each of these scenarios, your codebase will quickly grow. HTMX, however, allows you to express much of this control **using just attribute combinations, often without a single line of JavaScript.**
This aspect is truly astonishing. The shock I felt when I first encountered HTMX's `hx-trigger` might be comparable to a **C++ developer's reaction upon seeing Python code for the first time, thinking, "What? No type declarations?!"**
---
## Basic Triggers: click, change, submit {#sec-a730147be101}
First and foremost, it's important to understand that [[HTMX]] is designed to integrate seamlessly with the default behaviors of HTML elements.
For example, buttons are naturally associated with `click` events, forms with `submit`, and input elements with `change` depending on the context.
```html
```
This button will send a request on click, even without explicitly adding `hx-trigger="click"`.
The same applies to forms.
```html
```
In this case, the request occurs upon form submission.
In other words, HTMX already behaves quite intelligently in very basic scenarios. However, our focus should shift from here.
**Moving beyond defaults to explicitly declare the desired timing and conditions.** That's precisely what we want to achieve.
---
## Common Standard Events vs. [[HTMX]]-Specific Triggers in `hx-trigger` {#sec-8354ed76dc75}
First, it's crucial to familiarize yourself with the table below. The key takeaway is: **Standard DOM events provided by the browser are naturally usable, *plus* there are several HTMX-specific triggers.**
| Category | Value | Meaning | Common Use Cases | Example |
| ----------------- | ----------------- | ------------------------------------------------------------ | ----------------------------------------------------- | --------------------------------------------------------------------------- |
| Standard Event | `click` | Request on click | Buttons, links, action execution | `hx-trigger="click"` |
| Standard Event | `input` | Request on every input change | Real-time search, autocomplete | `hx-trigger="input changed delay:500ms"` |
| Standard Event | `change` | Request when value is confirmed to change | `select`, `checkbox`, input reflection after blur | `hx-trigger="change"` |
| Standard Event | `submit` | Request on form submission | Form submission | `hx-trigger="submit"` |
| Standard Event | `keyup` | Request on key release | Key-based search, shortcut reactions | `hx-trigger="keyup delay:500ms"` |
| Standard Event | `keydown` | Request on key press | Hotkeys, keyboard interaction | `hx-trigger="keydown[from:body]"` |
| Standard Event | `mouseup` | Request on mouse button release | Reactions after drag/selection | `hx-trigger="mouseup"` |
| HTMX Specific | `load` | Request immediately on element load | Deferred loading, initial data population | `hx-trigger="load"` |
| HTMX Specific | `revealed` | Request when element appears on screen | Infinite scroll, lazy loading | `hx-trigger="revealed"` |
| HTMX Specific | `intersect` | Request when element intersects viewport | More precise lazy loading, scroll-based loading | `hx-trigger="intersect once"` |
| HTMX Specific Syntax | `every 5s` | Request at regular intervals | Polling, status updates | `hx-trigger="every 5s"` |
| Custom Event | `my-custom-event` | Request with a custom-defined event | Server headers, JS integration, loosely coupled event architecture | `hx-trigger="itemSaved from:body"` |
| Modifier | `delay:500ms` | Request only if no additional events occur for the specified duration | Debouncing, real-time search optimization | `hx-trigger="keyup delay:500ms"` |
| Modifier | `throttle:1s` | Limit repetitive requests within a short period | Prevent duplicate clicks, suppress excessive requests | `hx-trigger="click throttle:1s"` |
| Modifier | `once` | Limit to trigger only once | Initial load, one-time events | `hx-trigger="intersect once"` |
| Modifier | `changed` | Request only if the value actually changed | Input field optimization, prevent unnecessary requests | `hx-trigger="input changed delay:500ms"` |
| Modifier | `from:body` | Specify a different element for event detection | Global event reception, custom event handling | `hx-trigger="itemSaved from:body"` |
| Modifier | `[condition]` | Request only when condition is met | Modifier key combinations, input length conditions | `hx-trigger="click[ctrlKey]"` / `hx-trigger="keyup[value.length > 1]"` |
| Modifier | `consume` | Consume event to prevent propagation to parent/ancestor elements | Prevent conflicts in nested HTMX requests | `hx-trigger="click consume"` |
| Modifier | `queue:first` | Keep only the first event when queueing new events | Maintain only the initial request during continuous input | `hx-trigger="input queue:first"` |
| Modifier | `queue:last` | Keep only the last event when queueing new events | Search bar, autocomplete | `hx-trigger="input queue:last"` |
| Modifier | `queue:all` | Keep all generated events in the queue | When all events need sequential processing | `hx-trigger="input queue:all"` |
| Modifier | `queue:none` | Ignore new events if a request is already in progress | Completely block duplicate requests | `hx-trigger="click queue:none"` |
The `hx-trigger` value typically starts with an **event**, followed by an optional **filter** and **modifier(s)**. This means you can read it as: **“When something happens (event), under what condition (filter), and how should it be processed (modifier)?”** The general format is `event[filter] modifier modifier`.
```html
```
- `keyup` → when a key is released
- `[value.length > 1]` → only when the input value is more than 1 character
- `changed delay:500ms` → request only if the value has changed and there's no additional input for 0.5 seconds
## Several Useful Examples {#sec-d893c37bc6f7}
Although I've summarized it in the table above, it would be a shame to conclude here, so I'd like to share a few of my favorite trigger examples.
### Request Only After Input Stops: `delay` {#sec-cd31c7256394}
When building features like search bar autocomplete or real-time filtering, sending a request with every keystroke can burden the server and create a somewhat rushed user experience.
Using `delay` in such cases makes the experience much smoother.
```html
```
This code doesn't send a request immediately with every key press. Instead, it sends a request **after 500ms have passed since input stopped.**
This is, in essence, **debouncing**.
Implementing this with JavaScript would require managing timers, canceling previous timers, and re-setting them. However, with [[HTMX]], it's simply an attribute.
This feature is practically a staple for search, auto-suggestion, and filtering UIs.
---
### Don't Send Too Often: `throttle` {#sec-c84ae134ee88}
While `delay` gives the feeling of "waiting a moment after input stops before sending," `throttle` is closer to "limiting how often requests are sent within a short period."
```html
```
In this scenario, even if a user clicks the button very rapidly multiple times, you can control it so that excessive requests are not sent consecutively within a 1-second interval.
It's quite useful in situations like these:
- Prevent duplicate clicks
- Block excessively rapid repetitive requests
- Reduce server load
- Prevent accidental multiple executions of the same action
It's particularly worth considering for buttons like "Like," "Save," "Refresh," or "Synchronize."
---
### Automatic Requests at Regular Intervals: `every` {#sec-0195e4e0d263}
As you use [[HTMX]], you might find the `every` feature surprisingly appealing.
When you want to refresh a specific area from the server at regular intervals, you don't need to write separate polling logic in JavaScript.
```html
Loading server status...
```
This code sends a GET request to `/server-status/` every 5 seconds and updates itself with the response.
It has more uses than you might expect:
- Server status monitoring
- Displaying task progress
- Updating dashboard figures
- Updating chat notification counts
- Displaying simple real-time information on admin screens
Of course, caution is needed as overusing it with very short intervals can burden the server. But when used appropriately, the ability to achieve such functionality with only HTML attributes is part of HTMX's charm.
---
### Making It Work Only Under Specific Conditions: Event Filtering {#sec-c5a0b8688eb1}
The event filtering feature is truly excellent. When I first encountered it, I felt incredibly grateful to the [[HTMX]] developers and contributors. It's superb.
With HTMX, you can append conditions after an event to **restrict requests to occur only under specific circumstances.**
```html
```
This code won't activate with a simple click. The delete request will only be triggered **when clicked while holding down the Ctrl key.**
Such conditional triggers, though a small detail, can make the UX quite sophisticated.
For example:
- Execute only when a specific modifier key is pressed
- Execute only if a checkbox is selected
- Search only when input value exceeds a certain length
- Do not request when the string is empty
It can be extended with similar logic.
```html
```
This way, you can ensure requests are sent only when the search term is two or more characters long.
---
### `load`: Execute as Soon as the Page or Element is Ready {#sec-066488ddc1d7}
There are times when you want to populate certain areas with data as soon as a page loads. Examples include dashboard statistics, recommendation lists, or notification areas.
In such cases, you can use `load`.
```html
Loading summary information...
```
This code sends a request immediately when the element loads, then replaces or updates itself with the response.
It can also be used to avoid rendering the entire page from the server at once, instead loading only relatively heavy sections later. In essence, it's well-suited for simple **lazy loading** patterns.
---
### `revealed`: Execute When Visible on Screen {#sec-c2414c692dd8}
This trigger has a very intuitive name: it sends a request when an element becomes visible on screen.
```html
Loading more posts...
```
This approach is commonly used for implementing **infinite scroll**.
The moment a user scrolls down and this element becomes visible, the next batch of data is loaded and appended. It's very appealing because it allows for quite natural infinite scroll implementation without directly manipulating Intersection Observer with JavaScript.
However, while `revealed` is simple and convenient, it might feel insufficient when very fine-grained control is needed. In such cases, `intersect` is a better fit.
---
### `intersect`: Handling Viewport Intersection More Precisely {#sec-28f34a79a4dd}
If `revealed` is closer to the sensation of "has it appeared?", `intersect` is about handling **how much and at what point an element intersects with the viewport** more precisely.
```html
Loading analytics section...
```
In this example, a request is sent only once, the moment the element intersects with the viewport.
This approach is beneficial in cases such as:
- Loading heavy sections later on long pages
- Recording ad/banner display times
- Fetching data only when a specific area is actually visible
- Incrementally populating content based on scroll position
It's a feature you'll almost certainly use at some point for infinite scroll, lazy loading, and screens where performance optimization is critical.
---
## Server-Client Communication: The `HX-Trigger` Header {#sec-4c3d24e0673e}
As you continue to use [[HTMX]], there comes a point when simply having the browser send requests isn't enough. You'll want to **make other UI elements react together** after a server response is complete.
For example, consider these situations:
- Reload the list after saving is complete
- Display a save success message
- Update a counter value simultaneously
While you could bundle all of this with client-side JavaScript, HTMX allows the server to trigger events via headers.
For instance, in a [[Django]] view:
```python
from django.http import HttpResponse
import json
def save_item(request):
response = HttpResponse("
Save complete
")
response["HX-Trigger"] = json.dumps({
"itemSaved": {
"message": "Saving is complete."
}
})
return response
```
The client can then utilize this event.
```html
```
The reason this structure is beneficial is clear.
Because the server, after processing a save request, doesn't just send "Save Complete HTML" but can also send signals for subsequent reactions, such as **"Now update the list" or "Show a notification."**
In other words, the server and client communicate through a more loosely coupled event structure, moving beyond a simple request-response relationship.
While it might seem minor when starting small, this pattern becomes increasingly powerful as the UI grows.
---
## Conclusion {#sec-c62364d3c7cd}
In this article, we've summarized the core control attributes of [[HTMX]], focusing on advanced features centered around `hx-trigger`.
To summarize:
1. `hx-trigger` determines **when** a request occurs.
2. Trigger attributes include both standard browser DOM events and HTMX-specific events.
3. Conditional triggers allow requests to be initiated only under specific circumstances.
4. Modifier attributes can also be used to fine-tune events.
5. The `HX-Trigger` header allows the server to prompt subsequent client actions.
This concludes our summary for this article.
It's truly remarkable that all of this is possible **without a single line of JavaScript**. Or, to be more precise, **"without a single line of JavaScript *I* write,"** as the [[JavaScript]] code loaded via CDN is already running in the browser.
**Related Articles** :
- [Simplifying Dynamic Web Development with Django and HTMX (Part 1)](/ko/whitedec/2025/1/27/django-htmx-dynamic-web-simplification/)
- [Simplifying Dynamic Web Development with Django and HTMX - Ajax (Part 2)](/ko/whitedec/2025/1/27/django-htmx-dynamic-web-simplification-2/)
- [Simplifying Dynamic Web Development with Django and HTMX (Part 3): Django Integration Methods](/ko/whitedec/2025/1/27/django-htmx-dynamic-web-simplification-3/)
- [Simplifying Dynamic Web Development with Django and HTMX (Part 4): Payload Transmission Methods](/ko/whitedec/2025/1/27/django-htmx-csrf-token-integration/)
- [Simplifying Dynamic Web Development with Django and HTMX: Leveraging Forms and Serializers](/ko/whitedec/2026/4/22/django-htmx-forms-serializer-usage/)